Model Minutes M.O.M. (Multi Operations Missile)
Model Minutes - M.O.M. (Multi Operations Missile)
Contributed by Kathy Kippen
| Manufacturer: | Model Minutes  |
Brief:
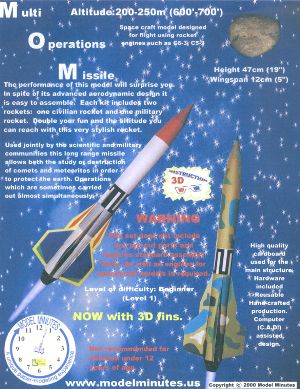
This is a skill level 1 kit with pre-printed full-color body parts printed on sturdy paper. Each kit comes with
instruction sheets done up in a three dimensional effect with 3-D glasses for viewing the color photos. I made the
'glasses' but could not use them so I just followed the photos best I could.
Construction:
The instructions begin with the assembly of the 3-D glasses for those who choose to use them. Actual rocket assembly
starts with cutting out all the tube, nose cone and fin parts and forming the tubes. This is not a difficult task, just
time consuming.
The next step is the fin assembly. The fins are scored on dotted lines and then folded into shape. Glue is applied and then one tab at a time, I held the edges of the fins together until the glue gripped the paper.
After the fins are assembled and set aside to thoroughly dry, a bulkhead with holes cut at the edges is glued into place ½â€ from the top of the booster tube. An outside coupler is then glued to the outside of the booster tube and the top body tube is positioned and glued into place at the other end of the coupler.
Next was making the motor mount tube, again rolling it around a pencil or dowel. I began by rolling it around a spent 18mm casing and used the casing during the gluing of the tube to press the inside edge in place. Adding the motor hook was easy as was wrapping the string around the tube and gluing it in place.
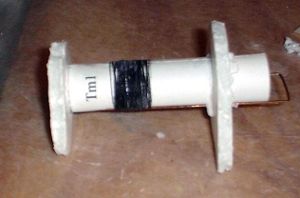
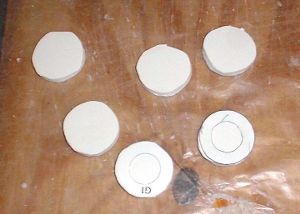
The centering rings are cut from the ¼" thick foamboard. Going slow and doing a bit at a time with a sharp X-Acto knife will help keep the cuts sharp with little problems cutting through the foam. After these have been cut, they are then glued into place on the motor tube after the motor retaining clip is in place, the thread included in the kit is wrapped around the tube, and a generous layer of glue is applied. The whole MMT assembly is then left to thoroughly dry.
After the MMT assembly has dried, it is glued into place in the end of the booster with the 'fringe' so that about an inch of the tube sticks out. After this has dried into place, the boat tail is added.
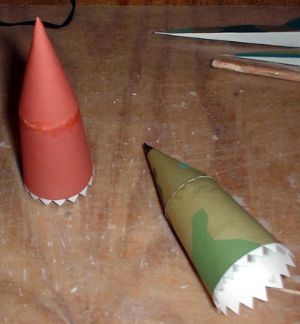
Next is the assembly of the nose cone parts. This is just gluing the two cones together and inserting the clay weight into the tip of the cone. Then the three bulkheads are glued, on inside the bottom edge of the cone, the other two to the bottom of the bulkhead above it. A screw eye is then inserted into the center of the shoulder.
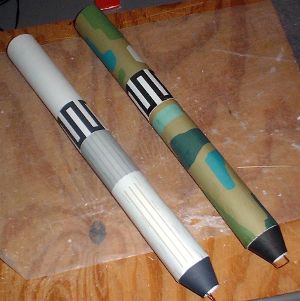
The shock cord attachment is a traditional Estes style tri-fold mount glued into the top of the body tube. The other end of the shock cord is then tied to the screw eye in the nose cone. The parachute requires assembly by using masking tape to tape the shroud lines onto the plastic/rip-stop nylon. I chose to use a large sewing needle to run the line through the fabric and tie it into place. The parachute is then looped onto the screw eye in the nosecone.
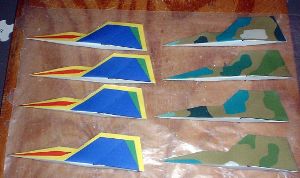
The last steps are to add the fins and launch lug. The fins are glued into place following the placement marks printed on the body tubes. When placing the fins on the military schemed rocket, make sure to match up the camouflage pattern on the fins to the body tube. The launch lug is then placed between two fins.
Finishing:
None is required as all parts are pre-colored.
Flight:
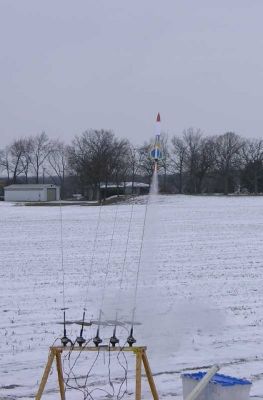
Both versions have flown several times on B6-4 and C6-5 motors for crowd pleasing flights.
Other Reviews
- Model Minutes M.O.M. (Multi Operations Missile) By Nick Esselman
The Multi Operations Missile (M.O.M.) kit is my second kit from Model Minutes and includes two rockets (note: the Minute in Model Minutes is not pronounced "min'it" like the time unit, but rather "mie nuet" like something small). Both rockets are the same with the exception of the color pattern. One is colorful with red, blue, yellow and white, while the other is a camouflage finish in various ...
Sponsored Ads
 |
 |


