Scratch Birdhouse, Version 1 Original Design / Scratch Built
Scratch - Birdhouse, Version 1 {Scratch}
Contributed by Dick Stafford
| Manufacturer: | Scratch |

Brief:
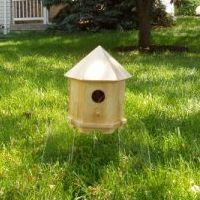
A while back, I saw a couple of oddrocs made from wooden birdhouses from Michael's Crafts. I was inspired and bought a couple, one hexagonal and one round, at a 2-for-1 sale. This article will describe the hexagonal version, which will fly on 29mm G motors.
Construction:
The parts list:
- One hexagonal birdhouse
- 29mm motor mount
- Spent 29mm casing
- Two 6-32 bolts with nuts and washers
- 3/16 plywood scraps
- ¾" pine strip
- Two rail buttons
- Lexan
- 3/8" elastic
- Kevlartwine

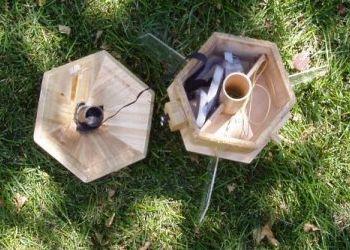
Construction started by carefully prying the roof of the birdhouse off. This naturally serves as a nosecone, however, it lacks a shoulder. I decided to run the motor mount to the top of the "cone" and use a chunk of a spent 29mm motor as the shoulder. The chute would reside beside the motor tube and would be protected from the top by a chute pad.
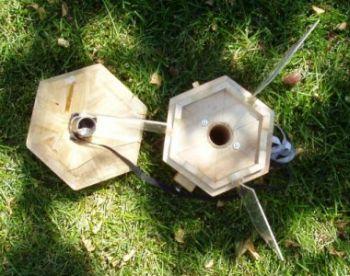
I drilled a hole in the base using my Harbor Freight drill press and a suitably sized wood bit. The center was easy to find by drawing lines from opposite corners. I also drilled holes for the bolts that would serve as mounting points for the motor clips.
Next I glued the mount in place, checking that it was vertical by measuring the distance to each corner. I used 5-minute epoxy throughout so the build would go fast. The Kevlarleader was inserted between the motor tube and the body and was wrapped around the back of the tube.
The base is thick (3/8") but the motor tube still needs some additional support. I cut two vertical braces that fit between the mount and wall of the body, and which are about half the depth of the cavity.
 To attach the piece of casing (bottom 2"), I inverted the cone and filled the tip with epoxy. With the casing inserted all the way into the motor tube, I placed the body on the cone and made sure it was seated securely. I then used a dowel to push the motor casing down into epoxy puddle. This ensured its alignment. I also epoxied a piece of elastic onto the tip of the cone (actually 2 pieces tied together--this was a "use what ya got" project).
I recently found that with proper care and a diamond cut-off disk in your Dremel, you can cut Lexan pretty easily so I whipped out three fins that extend below the body by about 5 inches. This overhang was based on what I remembered about the proven designs I had seen earlier. The bottom rim of the birdhouse, which protrudes from its base, was notched to accommodate the fins. The fins are also attached and heavily filleted with epoxy.
A thick piece of pine was required for the rail buttons to clear the cones overhang (I guess this overhang would technically be the eaves.) This could have been narrower, but since the overhang mostly occludes it and I'm not going for altitude, it sufficed.
I modeled the hexagonal structure in Rocksim 8 using circular parts whose diameter is the average of the short and long dimensions of the actual rocket. I also plugged in the actual weight and CG. My ace in the hole was knowing someone who had proven rockets based on the same product. I added nose weight and ended up with a static margin of 2.0. This seemed tight, but the Birdhouse will have a ton of base drag.
Finishing:
Finishing consisted of a couple of coats of Minwax Polycrylic. I also brushed on some Helmsman spar urethane over the fillets so exposure to UV wouldn't yellow them.

Flight:
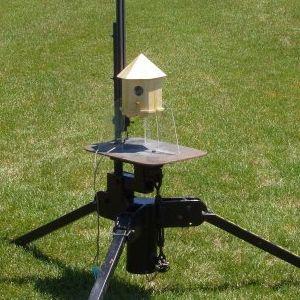
I used a 36" nylon parachute, which I attached to a loop in the shock cord. It was placed in the nose and covered with dog barf wadding. I flew the Birdhouse on a F52-5T. It weathercocked a little and ejection was just past apogee. The next flight will be on a G79 or G77.
Recovery:
The 36" chute spared the Lexan fins.
Summary:
What's there to say? This is a unique, inexpensive rocket that is sure to get people’s attention. I need to get an ornamental bird to place in the "door".
Sponsored Ads
 |
 |


