| Manufacturer: | U.S. Rockets  |

(by Nick Hills)
 Brief:
This is a single stage, 54mm motor mount, 2.6" high power rocket. This
rocket would be a great rocket for people with previous experience with high
power kits.
Construction:
There were two (2) very nice 2.6" tubes, they were a bit thicker than LOC
tubes, very heavy duty. There were three (3) 3/16" plywood fins, a
coupler, motor tube, launch lug, parachute and a very, very nice solid balsa
cone. There was a 1/2" by 10 foot long elastic shock cord, with a 18"
military surplus chute. The rocket split in the middle, so you have a payload
compartment to put electronics or what ever you want in it.
Construction was pretty straight-forward and simple. The instructions were not well written and were a little scarce of information on some key steps. However, with my experience, I did not really refer to them much. I decided that the 54mm motor mount was way too big for what I was going to be using it for. So I added a 29mm motor tube and mounted it inside the supplied 54mm motor tube.
The fins are through-the-wall and you will need to cut and mark the slots off yourself. There was a 1/2" launch lug that I replaced for a 1/4" lug.
The nose cone was great, it was balsa, which you don't see much anymore, I put 2 coats of finishing resin on the cone (my first attempt at doing this), and it turned out great, it adds some strength to the cone while making a great finish.
The completed rocket is pretty rugged for the materials used. This rocket could survive some very hard landings. You will need epoxy (set times of your choice) for construction.
The shock cord I mounted to a steel cable attached to the centering ring, I thought this was much better then the recommended method. The recommended method was a Estes style mount, which is great for Estes rockets, but when you get up to mid or high power rockets, they just don't work.
Finishing:
Finishing was easy, I put two coats of primer on, then painted the payload
section with Testors Dark Gloss blue, then fading the blue to Testors Gloss
Black. The results were great. The spirals are not deep at all, so there is no
real need to fill them. Decals did come with the kit, but I opted not to use
them, as I thought the kit without the decals looked better. Also, the decals
were rather cheap, they were printed on cheap clear sticky decal material. The
printing quality was terrible. They were all words in flat black.
Construction Rating: 3 out of 5
Flight:
For the first flight I used a Aerotech G104-short. The rocket does weigh a
bunch, due to it needing a bit of nose weight (also the addition of the 29mm
motor mount). The kit did not come with any nose weight, it did tell you were
the CP was. So I used that to balance it out with the biggest motor I would
use. With the extra weight, I swapped out the 18" chute for a 24"
nylon chute.
The boost was very fast and straight. Despite the 20mph plus winds, recovery was fine with the 24" chute, it came down just at the right speed.
There is no motor retention that comes with the kit, so you have to add your own, I just used tee nuts and made some clips up for it. This rocket does require wadding, but you could easily make a baffle or use a Nomex® heat shield if you wanted to.
Recovery:
The shock cord was plenty long for the rocket. As I said above, I put a
24" chute in it, as the 18" was too small. It came down at the right
speed with that. Upon recovery there was no damage at all to it!
Flight Rating: 5 out of 5
 Summary:
The rocket kit is very nice, there are a few things that could have been
better, a bigger chute would have been better, along with some better
directions. The rocket flies great though, which makes up for those things.
Overall Rating: 4 out of 5
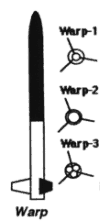
Editor's Note: The Warp-2 is part of a 3 rocket family, all using the same body but with different motor configurations. The Warp-1 is a single 29mm, which the author modified his Warp-2 into. The Warp-2 is the 54mm and the Warp-3 is a cluster of three (3) 29mm motors.
Sponsored Ads
 |
 |


