| Construction Rating: | starstarstarstarstar_border |
| Flight Rating: | starstarstarstarstar |
| Overall Rating: | starstarstarstarstar |
| Manufacturer: | Sunward Aerospace  |
 Brief:
Stylish 3FNC (3 fin and nose cone) rocket from Canadian manufacturers Sunward
Model Aerospace.
Construction:
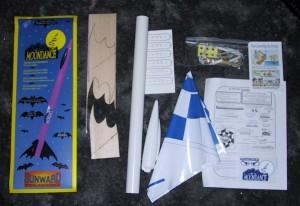
The Kit comes in a transparent plastic bag, sporting a VERY colorful face card.
The kit contains:
- 1 45cm BT56 Body Tube
- 1 Plastic Nose cone (the same cone used in all Sunward kits, it seems)
- 2 Engine Centering Rings
- 1 Engine Block
- 1 18mm Engine Tube
- 1 Parachute (unassembled)
- 1 Engine Hook
- 1 Rubber Shock Cord
- 1 Fin Reinforcement Tabs
- 1 Launch Lug
- 1 Sheet of Laser Cut Fins
- 1 Decal Sheet
The usual paraphernalia (glue, knife, sandpaper, paint, etc.) is also required.
The rocket comes with instructions written in both English & French. They are very clear and anybody who's built an Estes level 1 kit (e.g. Big Bertha) would have no problem in assembling this kit. The components are all of exceptional quality but not the usual "run of the mill" components found in most kits nowadays. The Engine Centering Rings are much bulkier than usual. The Engine Hook is a threaded L-shaped piece of metal rather like a simple domestic picture hook. The Nose cone is made of High Density Polyethylene and the parachute is made of a much higher quality plastic than the usual "Happy Shopper carrier bag" plastic chutes.
 I
had three main concerns with the components. Firstly I was a little worried
about the loose fit of the Engine Centering Rings, inside the main body tube.
Looking on Sunward's website, I found that the Centering Rings are designed to
soak up some of the glue and expand. This they did so this fear was unfounded.
The second worry I had was the Rubber material used for the shock cord. As I
was determined to build the model stock, I used the supplied cord but took the
precaution of installing a Nomex®
heat shield to compliment the recovery wadding.
The final issue I have with this kit, is the balsa fins. Although the balsa used is of tip-top quality, the design of the fins makes them far too fragile. Perhaps making them out of a light ply, would have been a better idea. If I was to build this kit again, I would definitely reinforce the fins.
 One technique used in this kit which I have not come across
before is the use of card tabs to reinforce the fin/body joint (as opposed to
glue fillets). Not sure I like this method but as I've only built one kit
utilizing this method, I'm reserving judgment. They do seem to be doing their
job.
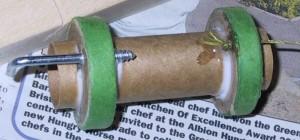
The Engine Centering Rings come with pre-drilled holes for inserting the Engine Hook. Again, I was determined to build the kit stock but the unused hole in the fore ring was just too tempting! I Quest-ified the rocket by threading a piece of Kevlar® cord through the hole, and securing it to the back of the ring with a small blob of 5min epoxy. I then tied the main shock cord to this instead of attaching it to the inside of the body tube using the 3-fold method described in the instructions.
Finishing:
Painting this bird was a doddle. The balsa and tube spirals needed almost no
filling. There is a HUGE gotcha with painting this rocket and that's the nose
cone. You MUST give it a thorough sanding with fine sandpaper before
priming/painting or the paint stands a very good chance of peeling off. This is
not in the instructions and it really needs to be there to save somebody from
ruining a paint job. I gave mine a good sanding and have had no trouble at all
with paint peeling.
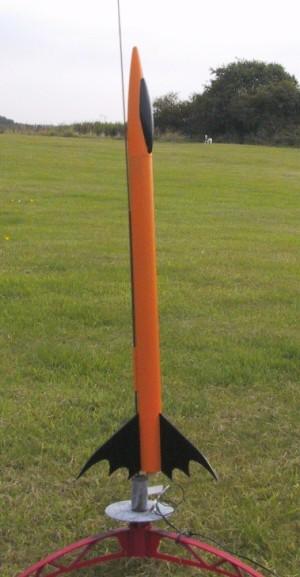
The face card artwork suggests painting the rocket pink and black. I'm not the worlds greatest fan of pink so I went for orange instead.
Construction Rating: 4 out of 5
 Flight:
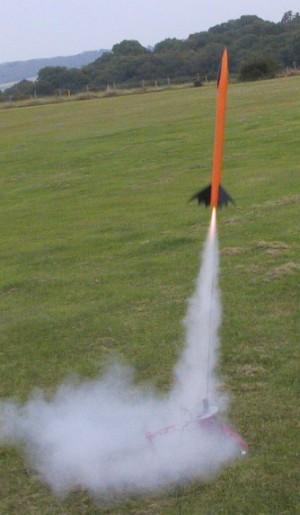
The first flight was on a B6-4 on a day with a very light breeze. The rocket
went a lot lower than I expected but looked really cool. I like low, slow
rockets This one is a beauty. The chute is a bit excessive and the rocket
drifted into the next field. It does need that chute with those fragile fins
though.
Second flight I angled it more into the wind and the bird touched down about 10 meters away from the pad after another majestic flight. No damage or wear to be found in either the fins or shock cord.
A week later I went out to try it on C6-5s but brought along a box of B6-4s again by mistake! I decided to launch anyway. The first flight of the day was essentially a repeat of the second flight in the previous session. I decided to launch just once more so I could see how the shock cord will hold up. I had been impressed by how the thing was holding out--no wear at all whereas a 'usual' cord is normally showing the first signs of wear after about 3 or 4 launches.
At ejection on the fourth flight, the nose cone/parachute separated from the shock cord/body. The main body hit the ground with a thump and the nose cone/chute drifted off. Luckily, the nose cone was heavy enough to bring the chute down within the field so that was retrieved. The fin on which the main body landed, broke cleanly along the grain and I was able to effect a repair on the spot using CYA. It turns out that the shock cord managed to untie itself from it's attachment point on the nose cone.
Later, I noticed that the damaged fin was slightly wobbly. The main glue joint between the fin and the tube must have broken but the fin tabs were keeping the fin in place. A little CYA should put this right.
Flight Rating: 5 out of 5
Summary:
This is a very good kit and considering it only costs £11, it is
exceptional value for money. The bat styling is very cool and should appeal to
Gothic-types and people looking for something different. It would be perfect
for a Halloween launch, natch.
The kit is easy enough for a beginner with a little experience to build: the unusual components and the possibilities of improving the kit (such as glassing the fins) makes this an interesting kit for a more experienced builder.
The reservations I had over the shock cord have turned out to be unfounded. In fact, this shock cord seems to be superior to usual. The recovery failure was down to the cord coming untied, not snapping or burning through.
On the strength of this kit, I'm certainly going to try other models by Sunward.
Overall Rating: 5 out of 5
Other Reviews
- Sunward Aerospace Moondance By Bob Cox
Brief: Single-stage 3FNC with cool bat wings. Length: 24.5" Diameter: 1.3" My daughter won this kit, donated by Sunward, in an EMRR Virtual Contest. Dan Westley has already written a very good review of this kit, so we're just going to cover the areas that were different for us. Construction: Materials: Dan has a comprehensive parts list, so I won't repeat ...
 |
 |
Flights
 |
 |
Sponsored Ads
 |
 |


D.W. (October 11, 2003)