Scratch Black Dragon Original Design / Scratch Built
Scratch - Black Dragon {Scratch}
Contributed by Lance Alligood
| Manufacturer: | Scratch |

Brief:
Black Dragon is a funnel fin rocket designed for use with most (but preferably
long burning) H, I, & J class motors. The rocket benefits from lightweight
parts like most rockets but a funnel creates abnormally high drag allowing for
lower altitude flights. I enjoy building saucers, spools, and high drag (low
altitude) designs as well as traditional rockets and wanted to combine the most
recognizable feature of each of these designs into a single rocket.
Construction:
Materials for the build were fairly common or at least easy to acquire. Parts
consist of:
- 1 36" x 2.6" glassine coated paper tubes
- 1 18" x 2.6" glassine coated paper tubes
- 1 LOC 2.6" nose cone
- 1 two quart motor oil funnel (7.5" OD)
- 1 one quart motor oil funnel (4" OD)
- 1 7" x 38mm MMT tube
- 2 2.6" x 38mm x 1/8" birch plywood centering rings
- 1 4" x 2.6" coupler tube
- 2 2.6" x 1/4" birch plywood baffle/bulkhead
- 2 1/4" diameter launch lugs
- 1 screw eye assemblies
- 2 8-32 x 1/2" nylon screws
- 20ft 9/16" tubular nylon
- 3 3/16" quicklinks
- 1 30" PML parachute
The funnels are the only uncommon rocket building items on the list. I found them in the automotive section of my local Wal-Mart for less than $1 each.
Construction was relatively simple but required some careful planning when it came to cutting, aligning, and attaching the funnels. Other points of interest in the design include a zipperless airframe with the recovery devices stored in the payload bay and this is the only high power rocket in my fleet to use launch lugs (I am a huge fan of rails).
Starting with the motor mount, I cut my own centering rings from 1/8" birch plywood. The motor mount tube was roughed up with 220 grit sandpaper before attaching the CRs 1/4" from the forward end and 1/2" from the aft end with yellow wood glue (aliphatic resin), including fillets. Once dry, the motor mount was inserted into the 36" airframe tube along with plenty of yellow wood glue to hold it in place.
 I used
Matt Stum's
Template Widget to print out templates for cutting the tips off the
funnels. I started by removing the eyehole (for hanging the funnel on hooks) to
give them a nice, round edge all the way around. After lightly scoring the
funnels with a razor knife, I used a high speed cutting wheel followed by a
sanding drum on my Dremel to get the funnels to slide snugly onto the airframe.
Two funnels are used for a few reasons. First, the main funnel needs support
underneath to better handle the stress while under thrust. Second, I'm lazy and
did not feel like making wood gussets and thought this would be an easier
solution. Third, I thought it would look really cool after seeing a review of
the Rogue
Aerospace Deep Surface Probe. My design is merely a simpler, HPR variation
of the DSP.
 A line
running the length of the airframe was drawn to define launch lug placement. I
used a couple of paper lugs that were leftover from my
USR
Banshee build. They were tacked to the airframe with CA and fillets were
applied with 12 minute epoxy mixed with milled fiber to provide additional
strength and thickness to the epoxy. I should also mention that this is the
ONLY place you will find epoxy on this entire build! I really had challenged
myself to not use epoxy at all, but I caved in when I needed a high build
adhesive for the launch lug fillets. The main funnel has a hole cut on the
forward edge inline with the launch lugs to allow a 1/4" launch rod to
slide through. While I am a huge fan of rails, I knew that this design would
look horrible with a hole large enough to allow a rail to slide through safely.
The main funnel was tacked to the airframe with CA and then Gorilla Glue
(polyurethane glue) is added for it's ability to provide extreme tackiness and
strength as it expands during the curing process for support underneath. The
smaller support funnel is attached in an inverted manner so that its outer edge
is in direct contact with the underside of the main funnel, along with a hole
to slide over the launch lug. Because I was unable to get inside the support
funnel once it was attached, I could only attach the smaller funnel with
Gorilla Glue.
Turning the focus to the forward end, simplicity and reliability were what I had in mind. It is a zipperless airframe design so the coupler bulkhead is 1/4" birch ply with 9 holes drilled into it--one in the center for the screw eye and 8 larger holes to allow the ejection charge to pass through to push out the payload tube and nose cone. The nose cone, which has the bottom cut out and a bulkhead with screw eye installed to increase recovery system volume, and payload tube are held together with a couple of small nylon screws. Even though this is an overstable design, having the recovery devices so far forward will ensure stability and allow me to use large 38mm motors (project target motors are 3-, 4-, 5-, & 6-grain Pro38s). And with the high drag design, dual deployment isn't really necessary since altitudes will still be reasonably low for single chute motor ejection recovery.
Finishing:
The paper tubes I used had minimal spirals thanks to the glassine coating.
Washing the nose cone to remove any release agents, cutting away any flashing,
and roughing the surface with 220 grit sandpaper has the nose cone ready to
accept paint. The plastic funnels were roughed up with 220 grit as well. The
entire rocket was primed with a couple coats of Krylon white primer followed by
Krylon Ultra Flat Black. I liked the stealth look of the whole design so I
didn't feel the need to add any additional colors, stripes, or decals.

Flight:
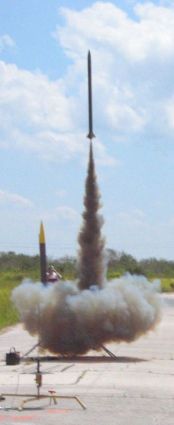
The Black Dragon's maiden voyage was on a Pro38 3-grain I212 Smokey Sam. I
really wanted a Smokey Sam motor for the first flight to go with the whole
black/stealth theme although I unfortunately couldn't get my hands on a black
chute. While prepping the motor, I realized that I had forgotten to drill vent
holes in the main airframe and payload tubes. One of my fellow club members
loaned me a small hand drill to resolve that issue. Finally, it was placed on
the pad and declared ready for flight. As with the classic propellant Pro38
motors, the Smokey Sam ignited instantly on the first attempt and sent the
Black Dragon hurtling into the sky. However, at the end of the thrust phase,
the rocket began noticably slowing, which is typical of high drag designs.
Unfortunately the nose cone and payload tube did not slow down at the same rate
of speed, causing a premature separation. The chute came out only a couple
hundred feet off the ground but the rocket was still travelling at a high
velocity. The sudden jerk caused bulkhead to be ripped from the nose cone,
sending the nose cone and payload tube to tumble recover separate from the rest
of the rocket. All parts landed within a few feet of each other though and
without any damage other than the forcibly removed bulkhead.
With the sudden decrease in velocity at the time of motor burnout, I am certain that very short delays--6 seconds or less--will be needed to safely recover this rocket in the future (barring any more premature separations!) The funnel was more than capable of withstanding the stress under thrust of an I motor.
Recovery:
The tubular nylon shock cord (with quicklinks) was borrowed from my Crayon
rocket and the 30" nylon chute was taken from my PML Phobos. A Nomex®
chute protector that I swap between several rockets in my fleet was used in
place of wadding. Having these in the payload tube ensures the stability of the
design wihtout having to rely on any additional weight being added for flight
on all but the largest 38mm motors. Aside from the vent holes in the airframe,
I also underestimated the loose fit of the payload tube to the coupler.
Post-flight analysis revealed that I should have used masking tape to snug up
the fit of the airframe tubes. The zipperless airframe design did its job
marvelously and prevented any damage to the main airframe. The bulkhead and
nose cone need to be sanded down and reattached. For such a sudden (and
accidental) deployment, I was certainly very lucky!
Summary:
The Black Dragon was an inexpensive rocket to build since the funnels were so
cheap (less than $2 for both), I made my own centering rings, borrowed recovery
components from other rockets in my fleet, and kept the overall design simple.
Aside from keeping expenses low, weight was kept to a minimum as well. The
final weight of the rocket is only 2 pounds without motors. Even though it
doesn't tip heavily on the scales, the high drag design keeps the rocket within
eyeshot on all but the largest 38mm motors.
Sponsored Ads
 |
 |


