| Construction Rating: | starstarstarstarstar_border |
| Flight Rating: | starstarstarstarstar_border |
| Overall Rating: | starstarstarstarstar_border |
| Published: | 2011-06-13 |
| Diameter: | 0.98 inches |
| Length: | 7.70 inches |
| Manufacturer: | Estes  |
| Skill Level: | 1 |
| Style: | Clone, Sport |
 Brief
Brief
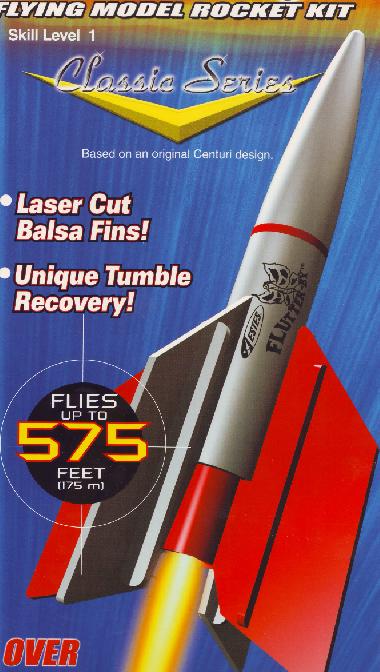
The Flutter-By is a stubby, futuristic rocket with an uncommon, two-piece tumble recovery method.
Components
Good quality balsa. Easyto separate the parts, including the strakes.
Nice large green adapter ring to slide the lower fin unit into the body.
Typical engine hook.
Construction
Well-designed kit. Overall good instructions. A few modifications are suggested.
First of all, the two components are named the "engine mount assembly" and the "upper body". I tend to think of the "engine mount assembly" as the "lower section" and the "upper body" as the "upper section"
Fin Preparation: This is not an altitude/performance bird. As will be mentioned in the flight section, altitude is NOT your friend with this rocket. You really don't need, nor want, this to go very high. Looking at the cover art, all the fins have a "flat" edge which adds to that retro look look. Also the strakes have flat edges. Keeping a smooth and flat edge to all the fins is easier to do and, in my opinion, looks better.
You also need to make a decision on how you want this to recover.
Tumble recovery works, but you can generally expect a bit of a "bounce" when it hits. While you cannot predict what is going to be the contact point, it probably will be a fin.
You can try to build extra-light and hope for a more gentle "flutter" or you can build a bit stronger. On my first try I used Elmer's Carpenter's Wood Filler. On my second try, on the lower section I elected to build stronger and papered the fins with no overlap on the edges. (Tim Van Milligan describes this method at http://www.apogeerockets.com/rocketry_videos/rocketry_video_16.asp.)
I think I like the papering better. It made the rocket stronger and made the finishing easier. You also need very strong fillets. Two very small, thin fillets (allowed to completely dry in between) are stronger than one thick one.
The fins come with pre-placed guide lines inked on the fins to help position the strakes.
For those, like me, who didn't knew what strakes are ... according to Wikipedia, a strake is "a protruding ridge fitted to an aircraft or other structure to improve aerodynamic stability."
In this case, the strakes are decorative wooden strips. Two go on each fin. This is a nice touch and gives the rocket that retro look. Yes, they add a bunch of useless drag, but again, this is not a kit designed for altitude records. If, however, you paper the fins you will conceal the marks. So you will need to create a paper guide to replace the marks.
The nose cone comes with a "pin" or cap (part J.) This is unneeded on this bird as the nose cone does not deploy, so I left it off.
Finishing
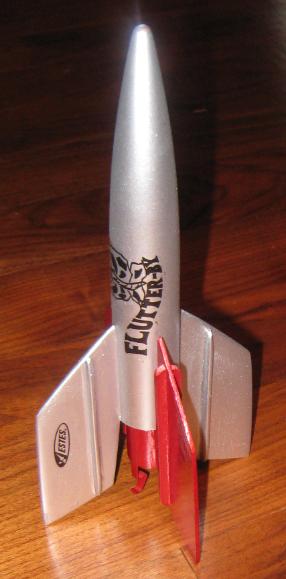 As mentioned, I first flew this bird naked.
The kit comes with one good quality, black-on-clear, water slide decal and it really adds to the rocket.
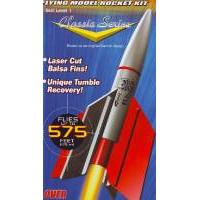
The cover art shows a red ring that covers the nose cone/body joint. Because of the recovery style of this rocket, the nose cone is permanently glued in place. But the kit doesn't include a red (or any other color) wrap around decal to mask the nose cone/body joint. After looking at several other Buck Rogers type rockets, I thought a "seamless" look would be cool and would match the "flat" edges of the fins.
I used Elmer's Carpenter's Wood Filler (formerly "Fill N'Finish") to hide the joint and the spirals. Because I papered the fins on the replacement lower section they didn't require any finishing aside from the primer. The upper section fins I also finished with the wood filler. The strakes I just smooth sanded. Again I think leaving the edges smooth, but flat, keeps the rocket in character.
I initially flew this bird naked which was a BIG MISTAKE as I will describe in the flight section. For my second flight (after replacing the lower section), the Flutter-By was finished as follows.
I used Krylon Primer (two coats) with light sanding between coats. Trying to sand the strakes is a little awkward.
The color scheme provided has the lower section red and the upper section silver. Thus you simply paint each section separately.
I chose Krylon Brilliant Silver for the upper section, and was very happy with the result.
Regarding the lower section, I knew this was small and wanted something bright and shiny to help me find it. A total "newbie" to metallic paints (isn't the color supposed to be the same as the cap of the can?), I tried Krylon Special Purpose X-Metals red for the lower section (engine mount assembly). Yes, I read the instuctions that tell you, "Apply X-Metal Converter to chrome and bare metal surfaces before applying X-Metals", but I ignored that. As I'm sure the more experienced rocketeers know, you can't get a shiny metal finish with just a can of this paint even if the cap looks shiny and metallic. When applied over white primer, I got a very nice, very NON-metallic red color out of it.
While I like the color scheme suggested, I would emphasize this is a very small rocket (at eight inches long) that breaks up into two even SMALLER pieces (the lower section is less than 4 x 4 inches) with NO streamer or parachute. Thus I recommend that you pick a vivid red or some other easy to see color, especially on the smaller, lower section.
Construction Score: 4
Flight
 The cover says this should weigh 1.4 oz finished. I came in at 1.2 oz. and that is with papering the fins on the lower section. I saved a bit by omitting the nose cone "pin" and by replacing the green centering ring with two standard motor mount centering rings (but I am getting ahead of myself.)
Given the light weight, I should have gone with the recommended A8-3 for first flight. But, with only light winds I chose one of a bunch of B6-4s from my box (mistake 1). Also, decided to fly the rocket "naked" (unpainted) the first time (mistake 2). I wasn't sure how hard this thing was going to come down. Although my field is 3/4 grass and only 1/4 pavement, I knew that the probability of having a rocket land on pavement is directly proportional the time taken finishing on the rocket.
Aside from featherweight and other tumble recovery rockets, no other bird is easier to prep for launch. No wadding is required. Shove an engine into the mount under the hook; shove the lower section into the upper; line up the fins; put in an igniter; stick it on the pad; and hook up your leads.
Okay, take another 1/2 second to make sure the fins between the two sections are spread evenly.
It was a lovely, late winter day. The grass was the color of, well, something between balsa and Elmer's Carpenter's Wood Filler. There were scattered leaves - leaves the color of an unpainted Estes body tube (you can see where I am going here).
I flew the rocket naked (the rocket was naked, not me). I did not bring a spotter (mistake 3).
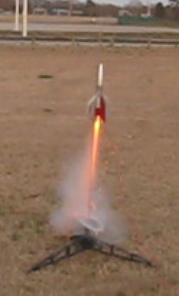
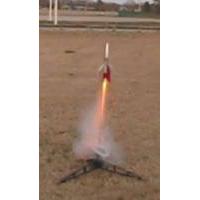
The first flight was a beautiful launch with some weather cocking due to large fin area on this rocket. I am not good at guessing altitude, but on the B6-4 apogee was barely in visual sight. I rapidly scanned back and forth trying to track the two pieces as they came down to earth.
At least one part of the rocket landed about 100 yards away in that balsa colored field with the scattered body-tube brown colored leaves. I was able to find the upper section. But, thirty minutes of searching failed to uncover the lower section (although I am sure I was probably walking right by it).
Fortunately it was the UPPER section I found and I had saved the balsa remnant. I now make copies of these from every rocket I build. I learned from the Glider Tips on EMRR to trace your fin and wing patterns so that, if you lose or break something, you can replace it.
Using the fin patterns and a basic motor mount with a short segment of BT-20, an engine hook, and two centering rings (the two centering rings worked well to replace the single large ring provided in the kit and, I think, weighed less), I was able to replace the lower section completely.
THIS time I painted both sections. This also tells you this would be an extremely easy rocket to clone and upsize.
For the second flight, I still didn't have a spotter, but I did have a bright silver upper section, a fairly bright red lower section. And I went with an A8-3. Perfect vertical boost, separation at apogee and a landing in easily visible range (critical with this recover system). Both parts landed about 75 feet from the pad on grass, undamaged. Later flights did have some weather cocking and some landed on the pavement causing minor damage including a fine that popped off.
Recovery
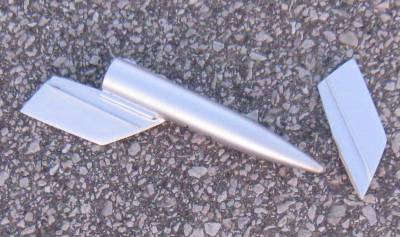
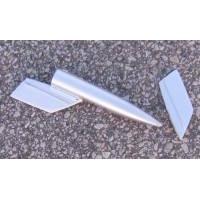
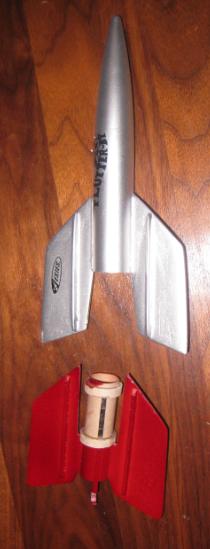 The concept of a rocket that goes up stable in one piece and comes down unstable in two pieces is very uncommon although not exactly unique. The Cyclone and the Maple Seed are helicopter variants that do something similar.
It is cool to watch and works well. But, the pieces do come down a little bit hard. The fact that the pieces are small (particularly the lower section) means you need sharp eyes (preferably two pairs or more). The parts also do not fare well when landing on pavement.
There is no point in using an engine larger than an A8-3 for two reasons. First, the whole point of this rocket is to watch the recovery. A B6-4, or larger motor, puts apogee and separation at the limits of (if not beyond) visual range. And, with neither of the small parts having a parachute or streamer, it's harder to recovery the rocket if it flies too high.
So, stick to using an A8-3 motor. Where's the fun in not getting to see the separation and tumbling? Second, because of the small size of the components, there is a good chance you may lose one or both pieces.
I'd rate this a 5 on flights with an A8-3 on a grass field, a 2 on a B6-4 with paved recovery area.
Flight Rating: 4
Summary
Pros:
- Really different recovery technique
- Extremely easy to prep
- Cool looking rocket
- Easy to replace lost components!
- Good candidate for applying paper skins to fins
- Perfect rocket to use up all those A8-3s from your Estes Blast Off Flight Packs
- On an A8-3, great small field rocket
Cons:
- Comes down a little fast - fine for grass fields, but plan on some dings and popped fins on pavement
- Small Parts - need bright colors especially on lower sections and SPOTTERS or you will lose it (spoken from experience)
- Do NOT try anything larger than A8-3.
Overall Rating: 4
Other Reviews
- Estes Flutter-By By Bill Eichelberger (September 3, 2014)
The Flutter-By is an Estes reproduction of a classic Centuri kit. It's a two-piece rocket with break apart recovery, and seemed to be a perfect kit to take along for an afternoon of B6-4 Field flying. I picked mine up during the Great Christmas Sale of 2013, almost as an afterthought. (The price was give-away cheap.) Although it was an afterthought, it was the first ...
 |
 |
Flights
 |
 |
Sponsored Ads
 |
 |


Hans "Chris" Michielssen (June 15, 2011)
Hi Tom, Great review on the Flutter-By. I had one of the original Centuri versions in the 1970s.
A correction though - This reviewed model ejects in two and tumbles (or flutters) to the ground. The Cyclone (or Mapleseed recovery rocket) designed by Jonathan W. Mills, Ph D. helicopters and spins in. Both parts of the Cyclone spin. The upper monocopter spins so well, it's sometimes lost on a bigger engine. The lower two fin section spins well also, but lands before the upper monocopter.