Scratch Explorer Original Design / Scratch Built
Scratch - Explorer {Scratch}
Contributed by John Partridge
| Manufacturer: | Scratch |
Build this rocket contest (Spaceship Design), Design entry F4.
Name: Explorer (EMRR Experimental)

This is not much of a write-up but the rocket that I built did not have much of a design. Last year I took special care to print out the photo of the rocket that I intended to build, measured everything and created scale drawings with multiple views of what I wanted to build. This year I didn't think I would even have time to get an entry done, when suddenly we were given a two-week extension. I had found a shampoo bottle (a Suave kids shampoo, Monster fruit scent) that resembled part of the main body of the rocket so I cleaned it up and was off. Due to time constraints and just to see if I could, I built this as a completely seat-of-the-pants kind of design. I measured little or nothing but sized things as I went along, trying them for fit and marking cut lines or trying things out with cardstock and then transferring the "design" to balsa or cardboard. The nosecone and other transitions were just formed out of cardstock and cut to fit. The bridge section that sticks up at the front of the rocket is several pieces of scrap balsa from a Cub Scout rocket building session, glued together and carded to shape with a second piece of dowel glued on top.

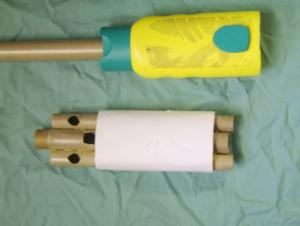
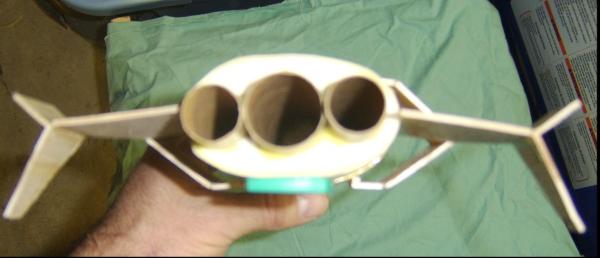
The top of the shampoo bottle was removed (later carved a bit and used as one of the attachments that appear on the rocket) and the original opening bored out with a 1-1/8" spade bit to make room for the central BT-50. A used D12-3 casing was used (with the inside end having several layers removed) to transition through the bottle top. Inside, I used the centering "rings" (ovals) to form an internal baffle so that the BT-20 tubes could eject the recovery system in the event of a central motor failure. The central tube has an 18 mm opening on one side, followed by a balsa block and then another opening on the opposite side. The gaps between the BT inside the baffle are sealed with yellow glue so that all of the ejection gases are forced to pass around the tubes before continuing to the top of the rocket.
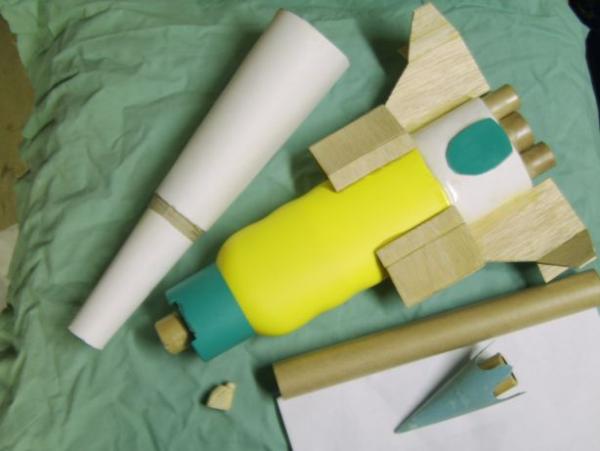
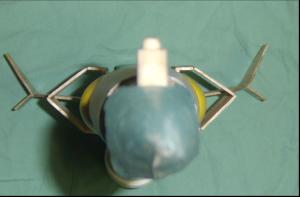
For stability, I used the cardboard cutout method to locate the approximate CP and then tried to locate the CG one diameter (using the wide part of the oval as the diameter) ahead of the CP by filling the nosecone with #6 lead shot and epoxy until it weighed nearly 4.5 ounces and I couldn't cram any more into it.
I ran out of time building this and took it to the MTMA launch at their field in Aurora, Ohio. I hoped that after an initial flight on a single D motor, I would attempt to fly it on a loaded cluster, perhaps beginning with outboard A's and then possibly C's depending on how the rocket flew and weather conditions. Unfortunately, it didn't work out that way. Despite my fears, the rocket had a stable flight and the baffle worked perfectly (I was concerned that too much pressure would leak backward through the baffle wall) and the recovery system ejected perfectly. However, while my Evil Ed chutes had been unfurling perfectly, due to the cold weather (somewhere between 20 and 30F) the parachute did not unfurl and came all the way down in a clump. The rocket hit the frozen ground hard and most of the fins were shattered into tiny pieces and the tip of the nosecone was broken off. There would be no more flying without extensive repairs and certainly no paint.
On the positive side, this was the first time I have tried this type of design for the baffle and it seemed to work well. This design turned out nicer looking that I had expected and I am still considering rebuilding it. If I do, the next time I will use basswood for fins (or at least take the time to use heavier balsa and reinforce them with paper), enlarge the fin set and probably lengthen the top portion to add additional stability. I really want to try this as a cluster.
Sponsored Ads

 Model Rocket Accessory")


 |
 |