| Construction Rating: | starstarstarstarstar_border |
| Flight Rating: | starstarstarstarstar_border |
| Overall Rating: | starstarstarstarstar_border |
| Manufacturer: | Estes  |

Brief:
The Challenger 1 was an Estes almost ready to fly kits that first appeared in
the 1977 catalog. The kit was a fairly generic looking rocket with a plastic
nose cone and fin can. The fin can would become one of the more durable in
Estes history, popping up on starter kits and stand alone kits several times
over the years. According to Barclone's Craig McGraw, some, if not possibly all
the kits to use this fin can were:
- #1235 Sky Writer #2
- #1260 Sky Writer #2 (same kit, different package)
- #1328 Kadet
- #1333 Scorpion (used 2 fin units)
- #1418 Star Trek (starter set)
- #1420 Star Wars Proton Torpedo (starter set)
- #1438 Dune Guild Heighliner (starter set)
- #1993 Lancer
- #2026 Athena
- #2042 America
Because the 1977 catalog was my first, I've always had a soft spot for the Challenger 1. When the opportunity arose to get one on eBay, I grabbed it.
Construction:
The parts list:
- Original nose cone
- Original fin unit
- Original 12" parachute
- Original 18mm engine hook
- Replacement section of BT-50
- 18" Kevlar® shock cord
- 24" sewing elastic shock cord
- 18mm engine mount
- launch lug
- decals

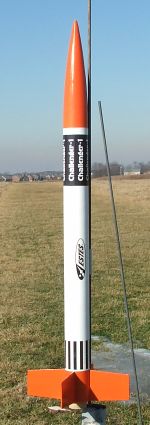
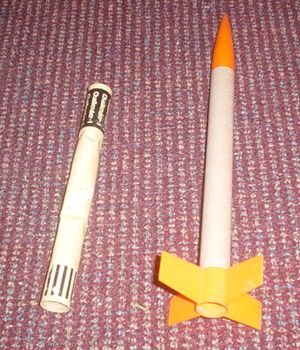
This wasn't so much a construction project as it was a restoration. I won a Challenger 1 starter set in an eBay auction and was shocked at the poor condition of the rocket when it arrived. (Turns out that was my fault. I hadn't looked closely enough at the auction. The seller had described it well, but I hadn't bothered to read before bidding.) The first thing that struck me was how thin the body tube material was. It seemed to be somewhere between typing paper and a regular body tube, but it was badly smashed in several spots, had yellowed to the point of being brown, and was obviously past saving. I was bummed because I had hoped to at least fly it a couple of times as another of my eBay rescues, but my spirits perked up when I made a discovery. The original builder had constructed everything with white glue, and the original body tube and engine mount simply slid out of the fin can when given a gentle tug. This left me with the original fin can and nose cone, so I decided to update the internals and give it a chance to fly. This was a simple matter of cutting out a like-sized section of BT-50 and constructing an updated 18mm engine mount (with an 18" piece of Kevlar® glued into the forward centering ring), then mating the parts together with something more substantial than white glue--I used LocTite Gel CA. The good news is that the Challenger is now assembled in a fairly sturdy fashion. The bad news is that the next person that attempts to "restore" it is going to have a heck of a time getting it all apart.
Finishing:
Finishing was a pretty simple process although not as simple as the original
build. The original Challenger 1 body tube was colored white and the plastic
nose and tail were orange, so it was a simple matter of putting them together
and slapping on the decals. The years had not been all that kind to the plastic
parts, so both were stuck into a scrap piece of BT-50 and sprayed with Valspar
Harvest Orange gloss. After eliminating the spirals with thinned Elmer's Fill
'n' Finish and some sanding, I primed the body tube and then sprayed it with
Valspar gloss white. Once the parts were together, I used a cleaned up decal
scan to print a new decal on Bel paper. As a result, when it's on the pad,
you'd be hard pressed to tell that anything has been done to it. It just looks
like an extremely clean example of a seldom seen old rocket.
Construction Rating: 4 out of 5
Flight:
I've only managed one flight with the Challenger 1 to date, but it performed
well enough to earn a spot on my small field list. Since I had very little to
compare it to, I chose to go conservative with the first flight and picked a
B6-4. Despite the somewhat weighty feel of the rocket, it performed well on the
B engine, topping out fairly high but not out of sight. There was some
weathercocking in the light breeze but that helped with the recovery walk.
Recovery:
Ejection occurred at apogee and the rocket drifted back toward the pad at what
looked to be a rapid clip. It recovered just past the pad and impacted hard on
its stock 12" chute, which spoke volumes of the damage I'd noted to the
original body tube. As thin as it had been, it wouldn't have stood up to many
landings like that one. Future flights might warrant a larger parachute, not
quite 18" but bigger than the 12".
Flight Rating: 4 out of 5
Summary:
PROs: Always nice to have the opportunity to fly something vintage, no matter
how simple.
CONs: Simplistic design and graphics. Suspect quality of original materials.
Overall Rating: 4 out of 5
 |
 |
Flights
Sponsored Ads
 |
 |


