| Construction Rating: | starstarstarstar_borderstar_border |
| Flight Rating: | starstarstarstarstar_border |
| Overall Rating: | starstarstarstarstar_border |
| Diameter: | 1.64 inches |
| Length: | 21.20 inches |
| Manufacturer: | FlisKits  |
| Skill Level: | 3 |
| Style: | Cluster, Sport |
 Brief:
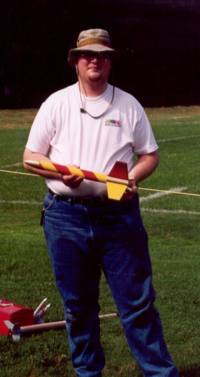
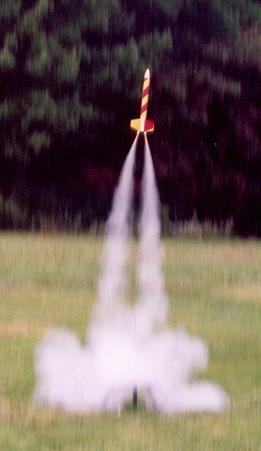
Dual Canted 18mm motor mounts. Designed to produce two distinctive smoke trails when launched.
Construction:
The Deuce's Wild comes with Estes quality parts. The Body tube is BT-60 sized, and is topped with a nice Balsa nosecone. The kit includes two 18mm motor tubes, and two thrust rings. No motor hooks are provided. Two sheets of balsa is used to cut out the four large fins form the pattern provided. The balsa I got was little on the soft side for my tastes. You also get piece of card stock, and a peal-and-stick pattern to make the two unique centering rings. The recovery system consists of a piece of elastic for the shock cord, and an official Fliskits 16" parachute that can also be cut down to 12" or 8". The kit also includes two pieces of 1/8" launch lug material... which I believe is two small for this rocket... 3/16th would be a lot better.
The most challenging part of the kit is the motor mount construction. The first edition of the instructions suggests a method that I think is impossible. I decided to do it my my own way. Construction starts with drawing a single line down the length of each tube, and marking the location where the motor spacer will go.
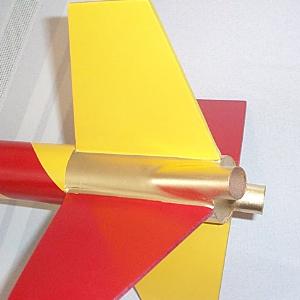 Then it is time to make the centering rings. The backing of the pattern is removed, and the pattern is stuck on top of the cardboard stock. Using a sharp knife, the centering rings are cut out. You will end out with three pieces. The Lower Ring, Upper Ring, and the Motor Spacer.
This is where I differ from the instructions. The instructions want you to glue the spacer to the upper ring first... what? How am I going to do that? Gluing the tip of the triangle to the centering ring... by the tip... and keep it aligned? I have a better way.
I glued the spacer to one of the motor tubes. When the glue set, I attached the other tube to the other side. I set the assembly on a flat surface to dry. I cut the upper centering ring in half, removed some material from the "tip", an glued them into position. I attached the Lower Ring following the instructions.
The fin marking guide is used for two purposes... to allow you to mark where the fins go... and provide the pattern to cut out the voids in the bodytube where the motor tubes will be sticking out. Then the motor mount assembly is glued into place.
The rest of the kit is assembled like any other brand of kit. You have to cut out the fins by hand, but the should be no problem for an experienced modeler... besides... that is small stuff compared to the motor mount just assembled.
 Finishing:
I decided that I wanted a smooth transition between the canted motor tube, and the body tube, so I used some Bondo Spot Putty to fill in the small gaps in the joints. After I was satisfied with the filling, I gave the kit several coats of Rust Oleum Light Gray Automotive Primer, sanding between coats.
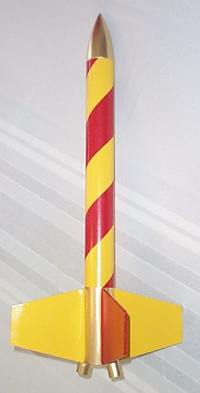
I decided that I wanted to paint the rocket a scheme worthy its name... I wanted some bright bold colors, and gold to add class. I gave the entire rocket a base coat of Yellow paint. Then I masked off two of the fins, and prepared a spiral up the body tube. I used Sunny Red spray paint. After the Red dried, I masked off the spirals, and the two red fins, and painted the area between the fins gold. I also painted the nosecone gold. There were no decals with the kit, those big fins are itching for something wild :-)
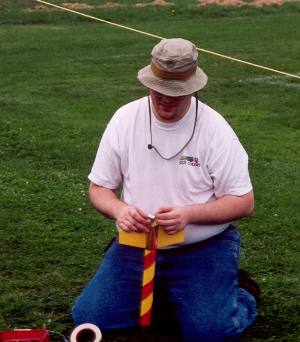
When the painting was finished, I assembled the recovery system. The shock cord was a standard piece of 1/8" elastic, and under a foot length. I did not want the nose cone to slap back into the body tube. so I extended the length of the shock cord. Also, I would suggest using 1/4" shock cord with this size kit, since 1/8" cord wears out faster, and handles less weight. The instructions were not clear on which size chute to use, but I decided that the 16" chute would be the best choice due to the large wing span of the fins. The shroud lines are attached with adhesive strips. Not a good idea... I suggest using those hole punch reinforcement disks instead.
 Construction Rating: 3 out of 5
Flight:
FlisKits recommends dual A8-3's, B6-4's, and C6-5's for the Deuce's Wild kit. My local hobby shop was out of B6-4's, so I bought a pack of B4-4's instead. I uses Estes Solar Igniters coated with a thin layer of Magnelite pyrogen to assure reliable ignition of both motors. The flight with the 2 A8-3’s was a nice and short. The parachute fully deployed, and the rocket landed close to the pad. Dual B4-4 motors offered another great flight. A shroud line came unattached from parachute, resulting in minor damage to the root of a fin. The flight with dual C6-5’s was the best. It exhibited a slight wobbled in flight, probably because the wind was picking up. The rocket landed on the roof of the school.
 Two days later, my Deuce's wild kit was recovered off of the roof of the High School. It was found floating in a puddle of water. I was able to remove the motors before they dry and glue themselves into the motor tube. The Deuce has some water damage, and the Balsa cone swelled with water saturation (or the tube shrunk?), but that is a easy fix by leaving the rocket in the hot car to dry out... and to adjust the fit with sandpaper. One fin came unattached from the body, probably because it had a small crack in it when I launched it on the 2 C's, and when in the water... the glue dissolved... The recovery system is shot... but I'll just put in an Estes 18" chute and replace the shock cord with a 1/4" piece of elastic. It will fly again... I am itching to stick two D13-7W's in it :-)
Flight Rating: 4 out of 5
Summary:
Overall, the Deuce's Wild is a very nice it. There is room for improvement, but you have to give FlisKits credit. The kit was very professional looking, and the design of the rocket is very unique. This kit is worth the money, and will turn heads at every launch. Just make sure your launcher can handle it, and pray that both motors light :-).
Overall Rating: 4 out of 5
Other Reviews
- FlisKits Deuce's Wild By Hank Helmen (November 13, 2008)
This is a skill level 3, two engine canted cluster rocket. The Duce has one body tube and uses four fins. It comes with a very nice balsa nose cone and two parachutes. The motor mount is unique but goes together easily and works great. Two pre-cut engine mounting rings are included with in the hardware. A BT-60 body tube is supplied in the kit as well as 30" of thin shock cord. The 1/8" ...
- FlisKits Deuce's Wild By Mike Salter
The Deuce's Wild! is (in my opinion) one of the most innovative kits available at the moment and will undoubtedly become a classic. It's unique point is the dual smoke trails from the canted motors, a great spectacle that grabs anyone's attention. The moment I saw the Deuce (when FlisKits first opened), I wanted one and soon set about trying to bring them to the UK...this basically involved ...
- FlisKits Deuce's Wild By Dick Stafford
Brief: Just another quick review of The Rocketry Forum's favorite kit...large fins, 2 canted 18mm motors, 'nuff said! I won't repeat all of this information, I'll just be pointing out what I think are the high points, assuming you have read the other reviews, above. The parts are all of good quality, and the laser cut fiber motor mount components make assembly easy. With a balsa nose cone, ...
- FlisKits Deuce's Wild By Carl Tulanko
Brief: The Deuces Wild is a very unique model rocket from FlisKits, a newer company on the block in the model rocket industry. The Deuce boasts a cluster using dual 'canted' 18mm motors, which gives it a really cool look both on the pad and in the air. The model came in a plastic bag, similar to Estes Rockets, but that is where the similarity ends. Inside the bag was a real balsa nosecone, ...
- FlisKits Deuce's Wild By Jason Toft
(by Jason Toft - 04/15/03) Brief: An awesome little rocket with dual canted motor mounts. Just BEGGING to be upscaled Construction: When I received my Deuce, there was one 17 inch BT-60 tube, a balsa ogive nose, fin stock, motor mount materials, and other miscellaneous materials required for construction. (launch lugs, chute, etc.) I opened the package and inspected the quality ...
 |
 |
Flights
 |
 |
L.V. (November 23, 2002)
G.D. (December 1, 2002)
J.F. (January 3, 2003)
C.T. (January 24, 2003)
J.W.M. (May 6, 2003)
D.A.S. (August 19, 2003)
S.E.O. (August 30, 2004)
Sponsored Ads
 |
 |


J.F. (October 2, 2002)