| Manufacturer: | Scratch |
And now for
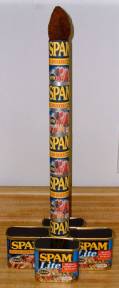
something really different..........SPAM MOBILE
by M. N. Lynch

Parts List
|
Traditional Flyers Parts List 4 Cans Traditional Square SPAM 8 Cans "Round SPAM" 2 Centering Rings 75mm-24mm 1 24mm LOC motor mount tube 1 Parachute 28" 1 Roll Duct Tape or Similar 1 3" LOC Nose Cone 12'- ½" Elastic Shock cord Pop Rivet Tool and Rivets Masking Tape 1 ½" Launch Lug cut into 2 halves 1 LOC SCM-2 shock cord mount Cellulose Wadding |
"New Age" Flyers Parts List Add the following to the Traditional List: 1 yard 12 oz Fiberglass (or KEVLAR) or CARBON FIBER material, G10 rings Fiberglass Motor Mount tube 54mm Kevlar Reinforced POP CHUTE - 72" Exotic Epoxy Mixtures and Additives KEVLAR reinforced fiberglass cone 200 yards of ½" Tubular KEVLAR Kevlar reinforcing tape Machined Metal Motor Retention Device Metallic Conforming Lug Forged Eyebolts, Grade 10 hardware KEVLAR blast shield |
Construction - Traditional Flyers
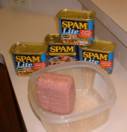
- Open all SPAM cans and place contents into Mom's Tupperware salad
container. Remove can lids and bottoms and wash thoroughly to remove all grease
and meat products

- Once dry stack the Round Cans One on top of each other securing them
to each other with 1" wide strips of DUCT TAPE. Be sure to pull the
tape tight to hold cans together well as flying can cause stress. (If you live
where round cans are not available, either use the rectangular ones and modify
the shape of the loaf - cone - or purchase a body tube to go with the plastic
cone or loaf you bake and color it with #2 colored pencils or magic markers.
- Drill 2 holes in each square SPAM can and into the column of round cans as
shown in drawing #1. Secure construction with pop rivets.
- Duct Tape "fillets" can be added for esthetics.
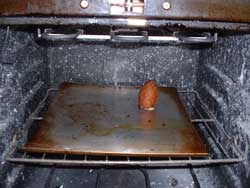
- Mold the SPAM in the Tupperware salad container into the shape of a
nosecone on an un-greased cookie sheet and bake at 350 degrees for about an
hour or until golden brown. Turn oven down to 120 degrees and dehydrate
until completely hard. As an alternate, use the LOC plastic nose cone and
paint it to look like cooked SPAM. If nose weight is needed, fill the
plastic cone with SPAM but be sure to reinforce the shock cord attachment point
as extra weight will break the plastic loop provided.


- Drill 2 small holes in the 3rd can from the top and thread
through the SCM-2 shock cord mount making sure you have about 2" of mount
inside the rocket to attach the shock cord to. Thread the ends back into the
opposite holes they came through and tie together back inside the rocket. Epoxy
a glob over the ends and secure with duct tape to smooth if necessary.
- Tie shock cord to SCM-2 using 2 square knots. Wrap knot with small strips
of duct tape to smooth.
- Secure the other end of the shock cord to the nose cone. If the SPAM cone
is used, drill into the center and epoxy cord directly into the core. Do
not attempt to fly this cone - it is strictly for looks. Use the plastic
cone.
- Epoxy the centering rings onto the motor mount tube about ¼" from
each end. Fillet when cured to reinforce.
- Sand motor mount assembly if needed to fit into round cans.
- Place a bead of epoxy about 7" into the rear of the rocket and slide
in the top of the motor mount assembly. BEFORE it dries place another
bead of epoxy about ½" into the rear of the rocket and continue
sliding the motor mount assembly into place. Set aside to cure (harden).
- Site a line for the launch lug as shown in drawing #1 down the length of
the body and epoxy on the launch lugs halves about 12" apart and in line.
- Apply additional fillets to the rear-centering ring and launch lugs.
- Attach parachute about 1 yard from the nosecone.
- Use masking tape to friction fit a motor of incredible power (E9-4) into
the rocket and let her fly.
NEW AGE FLYERS INSTRUCTIONS
Put all of those expensive unnecessary items in a box and auction them on ROL for 30% more than you paid for them. Follow the traditional flyers instructions and put the money you save into more rockets and motors. Rockets shouldn't live forever -- at least that is what Dad says.
Sponsored Ads
 |
 |


