Estes Constellation
Estes - Constellation {Kit} (1235, K-35) [1969-1978]
Contributed by Bill Eichelberger
| Construction Rating: | starstarstarstarstar_border |
| Flight Rating: | starstarstarstarstar_border |
| Overall Rating: | starstarstarstarstar_border |
 Brief
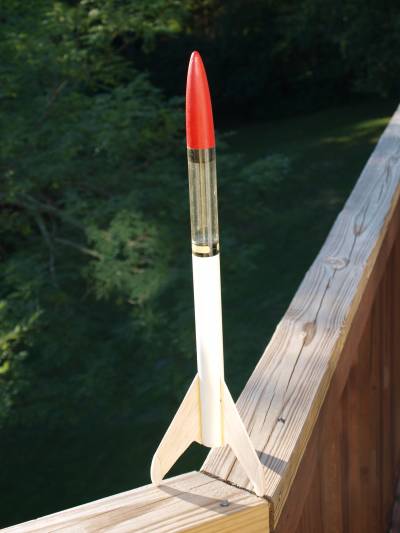
Brief
The Constellation was a common kit on the pegs at Kay-Bee Hobby and JC Penney Toyland, a cool payloader that I almost bought on several occasions, including my first ever rocketry purchase in the summer of 1977. I bought a Beta that night, mostly because there were four flights per pack of mini engines versus three per pack of regular engines, but I think the Constellation probably would have been a better choice.
Fast forward 34 years. A late night "Buy It Now" spree on Ebay garnered me a lot of vintage Estes parts and pieces. For the $10 Buy It Now price, ($18 delivered,) I got nine vintage nose cones, three vintage payload sections, a bag of old Estes igniters, a collection of parachutes and streamers, some launch rod spacing springs, and all of the important parts needed to build an Estes Interceptor. The stars of the lot in my eyes were the Astron Ranger and Astron Constellation payload sections. Both were obviously vintage, and since both Ranger and Constellation were on my "to do" list, they took a big jump in my build queue.
Components
- BNC-50X nose cone
- PST-50S payload section
- NB-50 nose block
- BT-50H body tube
- BT-20J motor tube
- EH-2 engine hook
- 2 CR-2050 centering rings
- CR-520 thrust ring
- LL-2B launch lug
- 3/32" balsa fin stock
- small screw eye
- two small snap swivels
- 12" parachute
Construction
While the Constellation is at heart a 3fnc kit, it does have some oddities that give the build some personality in the form of the "fin tip pieces" that sandwich the fin tips and need to be sanded and filled to look decent. To begin with, the curved shapes of the fins and the softer balsa that I used meant that my fins had some chunks out of them that would need extra Fill & Finish later. In that way they were a lot like the old "die-crunch" fins that Estes was known for back in the day. Much like another of my recent projects, an Astron Sprite, the Constellation might be a rocket that would make buying the laser cut fins from Semroc a cost effective idea. The price would be offset by the amount of frustration you'd miss out on.
My fins did look a bit shabby at first, and they scarcely improved after installation of the teardrop shaped pieces on each side of the fin. I used Elmer's white glue in this step and was seriously considering making the call to Semroc, but once the pieces were dry and I was able to start sanding, the improvement was immediate. Care must be taken to use only a thin scrim of glue when putting the tips in place. Excess glue would likely make the sanding portion of the fin project more needlessly difficult. The fins were glued on and filleted using white glue.
The engine mount was the only other part that I needed to build since I was using the old payload. I used while glue here also, and tied a piece of Kevlar around the motor tube to act as an anchor for the shock cord. I notched the forward centering ring and threaded the Kevlar through the notch before gluing the mount in place. To keep the Kevlar out of the glue when installing the motor mount, I pulled it back through the engine tube so that it stuck out of the back of the rocket. When the glue was dry it was a simple matter of threading the Kevlar back out the front of the rocket. Since I was using only the two centering rings and don't trust the masking tape trick, I placed the rings closer to the front of the mount so that the engine hook would have room to bend for inserting and removing the motor.
Finishing
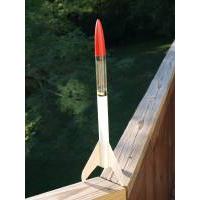
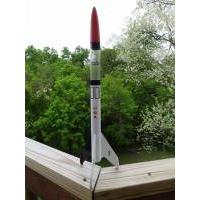
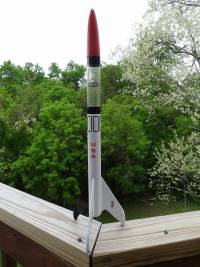
Because of the teardrop shaped fin tips, this is a rocket that really benefits from the thinned Elmer's Fill & Finish trick. I managed to cover the imperfections in the balsa with Fill & Finish and sanding, hiding both the seams and gouges. Painting was simple as the body of the rocket is all white, which I handled with the usual Valspar gloss white. The nose cone was finished when I got it, and unlike the other cones in the lot, it didn't look terrible. I ended up leaving it as it was. I made the decals myself in a trial and error printing session that found me printing up a perfect Micro-Maxx scale set of decals. Cute, but not what I was going for. The decals came out looking pretty decent, which was a good thing because they are a big deal on this model.
Flight
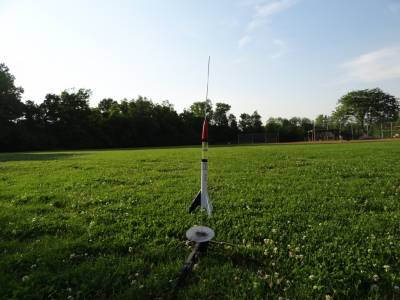
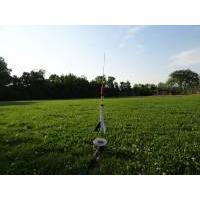
The first flight for the Constellation came at B6-4 Field as I had planned, but I hadn't planned to lose a just finished Mini Max on the previous flight, so I was a bit nervous. I had been thinking of starting with an A8-3 flight before progressing to the B6-4 flight, but the A8-3 proved to be every bit capable of pushing the limits of the field, and like I said, I was skittish by this time. The first flight was fairly high and arced over US 27. Ejection occurred just as forward motion had begun to slow and the rocket was plenty high enough to clear the trees as it rode the breeze back. Recovery was handled by one of the 10 for $1 chutes I got from Ebay a decade ago and it was flawless, with the Constellation landing within 15 feet of the pad.
The second and ultimately final flight came more than a year later at B6-4 Field. I'd taken the Constellation to the field with me on several occasions since the first flight, (including the ill-fated Astron Drifter flight earlier in the spring,) but I always had something else that got flown instead. On this occasion I acquired a "helper", a neighborhood 9 year-old who called the shots and pressed the button on the last few flights of the day. He picked the Constellation for the final flight of the day, so I loaded it again with an A8-3. He then did the countdown and launched the rocket so that I could try for a launch shot, but I still missed it. The flight arced back over our heads slightly. It came back in for what should have been a fairly soft landing, but I missed that as well, my attention diverted when my launch help dropped the controller and made a mad dash for the Constellation. Right over my engine totes and rocket box. I didn't realize the extent of the damage until later. Four rockets were damaged, one fatally. Another fatality of the flight was the Constellation, which landed hard on the infield dirt and suffered a badly broken fin. I might go ahead with that idea of buying a fin set from Semroc and make another new body for the old payload section, but I might just let it be a shelf queen. Time will tell.
Summary
Pros: Astron mystique. Great vintage lines.
Cons: Hand cutting the fins not one of the more pleasant experiences, but survivable.
 |
 |
Flights
Sponsored Ads
 |
 |

