| Construction Rating: | starstarstarstarstar |
| Flight Rating: | starstarstarstarstar_border |
| Overall Rating: | starstarstarstarstar_border |
| Published: | 2021-04-04 |
| Diameter: | 0.74 inches |
| Length: | 16.80 inches |
| Manufacturer: | Estes  |
| Style: | Sport |
 Brief
Brief
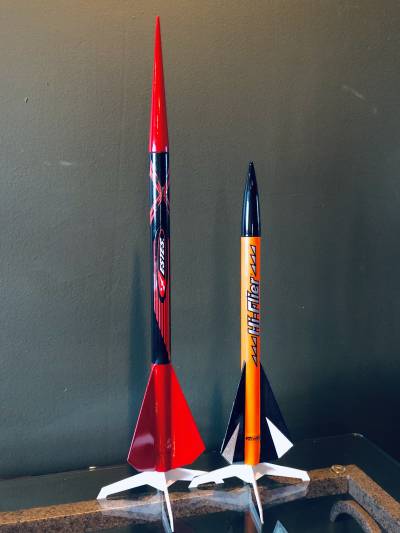
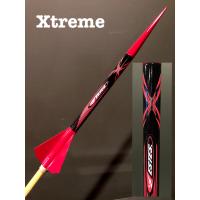
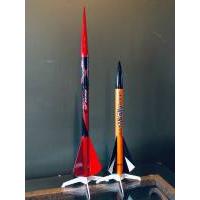
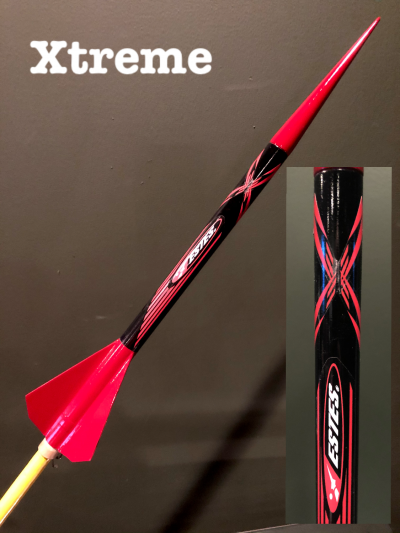
The Estes Xtreme appears to be an elongated clone of the Estes Hi-Filer. Comparison of the Xtreme vs the Hi-Flier:
- The body tube (BT) is 12 inches vs 9 inches.
- The nose cone (NC) is elongated and comes to a pointy tip vs a shorter ogive style.
- Because the Xtreme is longer in both the BT and NC, there is no need to add clay weight to the nose cone. (Clay weight is used in the Hi-Flier NC)
- Card stock fins are used instead of balsa.
Components
- Body Tube with slit cut out for engine hook
- Plastic nose cone
- Engine hook, thrust ring, and hook retainer ring
- Launch lug
- Tube to insert thrust ring inside BT
- Elastic shock cord
- Cardstock fins
- Mylar steamer
- Self adhesive decals
*Note: the body tube received was crushed. Contacted Estes customer service and they asked for a photo of the damage. Photo sent and by COB that same day an e-mail was received from Estes that a new tube was being sent out. Kudos for their customer service.
Construction
The instructions were straight forward and easy to follow. Deviations from the instructions as follows:
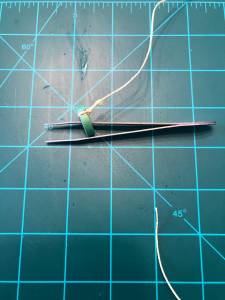
Instead of gluing the elastic shock cord inside the body tube, 130lb kevlar thread was attached to the thrust ring. (See attached pic). On a small diameter tube I find the shock cord mount inside the tube inhibits the release of the streamer. To attach the cord to the ring, cut a small "V" slit over in the outer edge so the thread can rest inside of it. Tie a knot around the ring and use a dab of thin CA to hold it in place. When the ring is glued inside the tube, thread the cord out the back of the push tube. When the glue dries, drop the cord back through the body tube so it comes out the other end for later attachment to the nose cone.
The card stock fins seemed a bit flimsy so they were laminated with paper. Six pieces of paper were cut a bit larger than the shape of the fins so there would be over-hang. Using an elmers glue stick, apply glue to one side of the fin. Apply the paper in a sweeping motion from left to right. A plastic kitchen bench scraper was then used to drag and smooth out the paper. Repeat on the other side and for the remaining fins. Fins were left underneath a heavy book overnight to dry and stay flat. The next day a hobby knife was used to trim off the excess paper. Thin CA was applied to seal the edges and then lightly sanded smooth. Please note that super glue was not applied to the fin edge that would be glued to the body tube. Fins were attached to the body tube with a bit of thick CA. Titebond II wood glue was then used to apply fillets.
Finishing
When assembly was completed a coat of Rustoleum Painters Touch 2x gray primer was applied. After the primer dried it was sanded with 220 and then 400 grit sandpaper. A second light coat of primer was applied then another light sanding of 400 & 600 grit. Rustoleuem painters touch 2X gloss black and red was used for the final colors. The upper body tube was painted black first with several light coats. When it dried (24hrs) the BT was masked off with tape and paper and then the lower part was painted red. A bit of improv was used with the supplied decals. The tips of the fin decals were cut off and used to create the "X". Three light coats of Rustoluem clear gloss was applied to seal everything.
Flight
First flight was with an A8-3. The delay was too short as the rocket was still climbing when the ejection charge went off. An A8-5 would have been better. Flight was fairly straight and true given the winds. Second flight was a B6-4 and the ejection seemed to occur right at apogee.
Recovery
The mylar streamer is very easy to see in the sunlight as it descends. A slightly larger streamer would be nice to slow the recovery just a bit. However, the current size of the streamer does make for quick recovery and therefore quick turnaround for multiple flights.
Summary
The Xtreme looks very sleek and slender with it's elongated NC. However, for comparison, the Hi-flier is a very similar looking rocket that is a few dollars cheaper with balsa fins. From a cost perspective, you may wish to go with the Hi-Flier. If you want a taller rocket with a pointy nose cone, then the Extreme is for you. It's basically what style speaks to you?
Related Products
Sponsored Ads
 |
 |
