| Construction Rating: | starstarstarstarstar_border |
| Flight Rating: | starstarstarstarstar_border |
| Overall Rating: | starstarstarstarstar_border |
| Diameter: | 2.22 inches |
| Length: | 18.10 inches |
| Manufacturer: | FlisKits  |
| Skill Level: | 3 |
| Style: | Odd-Roc, Sport |
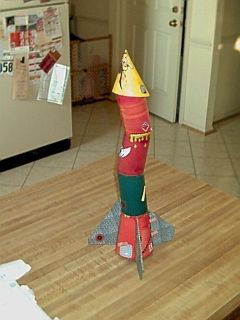 Brief:
This is yet another review of this unique, crooked rocket. Hopefully, this provides another perspective on its construction, finishing/decoration, and flight.
Construction:
The FlisKits kits are professionally packaged and this is no exception. The printed face includes is in full color, includes photos and specs, and a serial number--mine is #87. The small parts are contained in a small Zip-loc bag. My only minor complaint is that the cardstock sheet with the bottom shroud was rolled in the BT-70 tube, and the curve on the shroud was backwards. It took a little more work to roll it, but this didn't really hurt anything. There are eight pages of detailed instructions.
The rocket consists of a full length BT-50 tube that also serves as the motor tube. Around this is a series, of shrouds, sections of custom cut BT-70 tubing, and centering rings, which form the crooked outer shell. The highlight of the components are the seven laser cut rings, which include alignment tabs. The middle six rings also include a hole that allows you to align the ring set using a standard launch rod; this is an simple, but well thought out feature.
Templates are provided for all the cutting, and I recommend you take your time. Assembly is a bit tricky as you are told to insert the thin centering rings halfway into each angular tube. I failed to accomplish this. Thus, the intersection of the BT-70 sections is not as clean as they could be, but the rocket still went together and is quite sturdy.
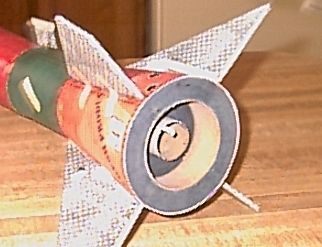 Motor retention is accomplished with both a cardboard ring and a motor hook. The motor itself is recessed into the base of the rocket which I think gives it a cool look.
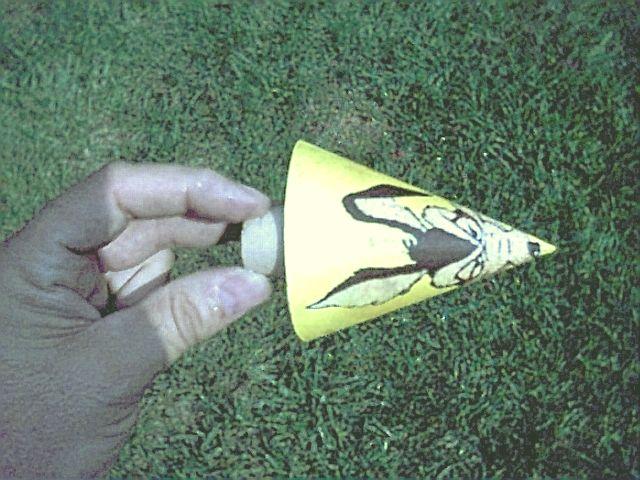
For the nose cone, I formed the shroud that came with the instructions (shortened a bit so it wouldn't hang out) and glued it into an outer shroud that I decorated and printed myself. I used Devcon 2-ton, 5-minute epoxy, which is the same epoxy recommended by Art Applewhite on his kits and will not bleed through the cardstock. While I was at it, I glued in the nose cone's centering ring using the 5-minute epoxy. The nose cone's shoulder consists of a BT-50 sized balsa coupler that is glued into a pre-cut hole in the nose cone's centering ring. A eyehook completes the cone. There is a chunk of clay to provide stability, but unlike most rockets it doesn't go in the nose. Instead, to fill the top of the rocket between the top centering ring, the BT-70, and the inner BT-50 tubes.
The fins are all uniquely shaped and complete the odd looks of the kit. These are glued directly to the bottom cardstock shroud. I used white glue and added several layers of fillets. The fins still seem loose, as the shroud does not provide a firm base. If I was to build it gain, I'd make a second shroud and epoxy it into the first, similar to what I did on the nose cone. I just wasn't thinking at the time.
While I was assembling the body, I ran a section of Kevlar twine through the BT-50 tube, tied it around the tube, and epoxied it to a centering ring. I tied the stock elastic cord to this leader, and to the hook-eye installed in the cone. I haven't yet assembled the plastic chute that was provided with the kit.
Finishing: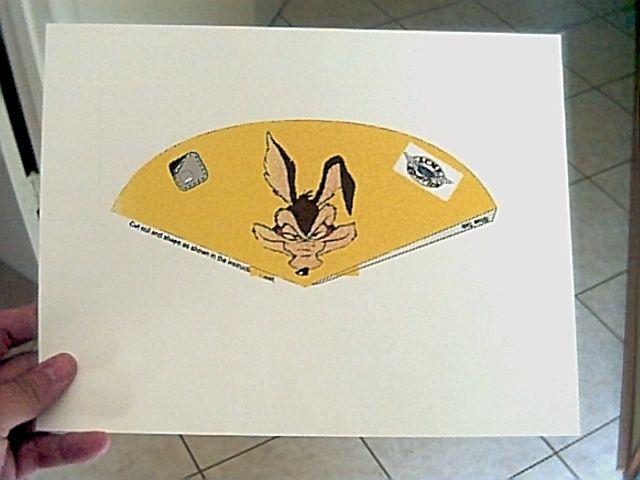 The Spitfire requires finishing like most rockets. FlisKits does have a set of 'skins' that can be downloaded for free from their site. I printed the skins on the recommended Avery 5265 full-page label paper using my OfficeJet printer. The sizing of the skins was a bit off, but it was easy to fill the gaps with strips of similarly colored stickers, which I conveniently had leftover since I didn't check the printer setting the first time through. One thing about FlisKits is that they actually LISTEN to their customers. By the time of this posting, the wraps will be updated.
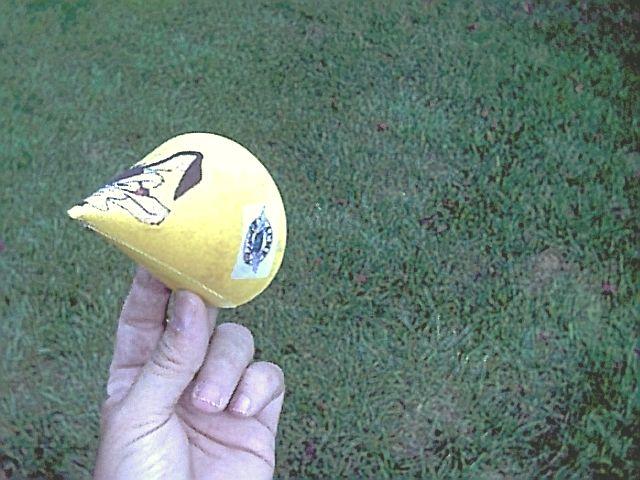
I decided to make my own nose cone shroud with Wile E. Coyote on it. Since blank skin templates weren't yet available, I scanned the template from the kit. I had found a front view of Wile E on the net, but knew he wouldn't look right if he was simply pasted onto the shroud. Therefore, I used a distortion filter in Adobe Photo Deluxe to wrap Wile E over a sphere. Thus, when the cone is formed, he was more-or-less straightened back out. I "borrowed" a few bits of graphics from FlisKits to complete my shroud, which I printed directly onto cardstock.
 I also added a bunch of random stickers: band-aids, extra metal patches/hatches, dripping green ooze (stole the idea from Carl Tulanko), and even my own "no BATF" sticker. I sealed the edges of the stickers with white glue, as recommended and shot two coats of clear enamel over the whole thing.
Construction Rating: 4 out of 5
Flight:
There is nothing out of the ordinary about the prep of this unique rocket. The C11-3 gave an arrow-straight flight with ejection at apogee - perfect! The ejection went off with an extra loud POP, since I guess there was a lot of shock cord and chute to eject.
Recovery:
I used an Estes 12in chute that I already had assembled. This was a hard decision. On one hand I was worried about the fins, on the other hand the BT-50 doesn't leave much room for a chute. However, the recovery was fine with no fin damage.
Flight Rating: 4 out of 5
Summary:
FlisKits is proving to be a highly innovative kit manufacturer. The Spitfire is about the most unique kit I've seen. It is not the easiest build, but the instructions are great. Plus, as someone on TRF commented, looking a bit dilapidated may actually *help* the looks of this kit! :-) Despite its crooked, funny-looking profile, the Spitfire flies as well as it looks. I can't wait to see what custom skins people come up with. The only concern I have is the attachment of the fins to a paper shroud. In conclusion, this would be a great addition to anyone's fleet!
Overall Rating: 4 out of 5
Other Reviews
- FlisKits A.C.M.E. Spitfire By Bill Ralston
Brief: This is one bizarre rocket that looks like it should not fly. Construction: The rocket is made from a BT-50 inside pieces of BT-70 with 6 centering rings, balsa nose cone, and 4 fins (all are a different shape) mounted to a paper transition piece. The instructions were very precise and easy to follow with lots of useful illustrations. It is my opinion that the ...
- FlisKits A.C.M.E. Spitfire By Chan Stevens
Absolutely the most INNOVATIVE commercial kit I've ever seen in rocketry, this rocket looks like Wyle E. Coyote has built and flown it a few too many times. You won't believe it flies nor will anyone else at the pad, yet you'll all be laughing your fannies off when you witness its perfect flight path. I witnessed the prototype of this kit in action at NSL this May and have been chomping at the ...
- FlisKits A.C.M.E. Spitfire By Carl Tulanko
The FlisKits ACME Spitfire was a long awaited item from their line of models and was recently introduced at NARAM 45 in Evansville, Indiana. Well, I just had to be first in line to get a couple of these kits, one to save and one to build. I had seen this model debut at NSL 2003 earlier this year as a prototype and it’s a real head-turner. The kit resembles something you would see in a ...
 |
 |
Flights
 |
 |
Sponsored Ads
 |
 |


J.F. (August 22, 2003)