| Construction Rating: | starstarstarstarstar |
| Flight Rating: | starstarstarstarstar_border |
| Overall Rating: | starstarstarstarstar |
| Manufacturer: | RocketHead Rockets |
 Brief:
The Rockethead Rockets (RR) Battle Axe is a near minimum diameter single stage rocket that flies on 18mm motors & when held near the nose, indeed resembles a battle axe. This is a great skill level 1 rocket that combines the best features from model rockets of old (balsa nose cone & water slide decals) with modern elements (laser cut fins, Kevlar & extended elastic shock cord, Mylar parachute) that would typically be considered upgraded items.
Construction:
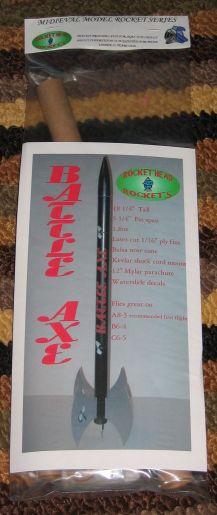
The Battle Axe arrived at my door in a long, triangle shaped tube, well packed with old newspaper. It is worth mentioning that it was sent with USPS delivery confirmation. Everything was intact & undamaged. The packaging is comparable to many other rocket vendors that have "store ready" packaging. Opening the main wrapper revealed numerous pleasant surprises! First is the backside of the header card was printed that the card was worth 5 Rockethead Rocket fun points. Looking on the RR website, I found out more information about the fun point program. As you purchase more products from RR & in turn accumulate more fun points, they can be redeemed for RR products. In fact, 5 points was enough for one of their 10" Mylar chutes! And it only got better from there...
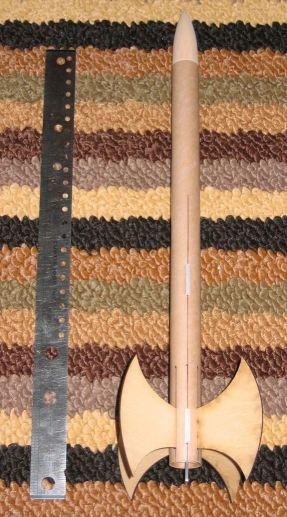
What I thought to be an extra touch was that there were several smaller plastic bags containing subassemblies for the rocket. One contained the laser cut 1/16" plywood fins, another the launch lugs & entire recovery system, & the third had the motor mount. (And that's no typo--the fins are three-ply plywood fins with a total thickness of 1/16"! The fins are very strong for an LPR & should be able to withstand multiple hard landings with minimal damage.) As much as it makes it easy for the builder to locate the appropriate pieces, I'm sure it also raises the quality control for RR to ensure that all parts are in the main bag. The BT-50 tubing and balsa nose cone were loose in the bag along with the instructions. The instructions also raise the bar, especially for LPR, in that there is plenty of documentation along with numerous helpful color photos to guide you through the build process! Reading through the instructions almost caused a panic as I didn't see the waterslide decals, however, they fell out of the instruction manual. And they are indeed real waterslide decals provided by Tango Papa!
Construction was easy with no surprises. Rockethead suggests that the Battle Axe can be built using either white glue or quick drying epoxy. I used white glue because I didn't want the hassle of mixing epoxy and wanted to take the approach of a newbie building this kit.

The motor mount consists of a piece of BT-20, 3 centering rings (2 big & 1 small), & a metal motor clip. The fit together & then into the main BT-50 tube were all snug just like you would want them to be. The glassine covered BT-50 was probably the smoothest tube I've ever seen--the seams are non-existent--and so smooth that I had to resort to using a ballpoint pen to draw the fin & launch lugs lines. A pencil simply wouldn't write on them!
From there, I used CA as recommended to attach the fins and launch lugs to the BT, followed by white glue for the fillets. The fins aren't going anywhere after that but I felt that they had a little more flex than I normally see in a fin/body tube attachment joint. That might be why RR recommends using epoxy for the build... And one thing I might consider changing is attaching the launch lugs before the fins only because it was difficult to get the tip of the bottle close enough to squeeze out the glue without getting it where I didn't want it. Pretty nitpicky of me though, wouldn't you say?
Turning my attention to the forward end of the rocket, the screw-eye is twisted into the balsa nose cone, which (pleasantly surprised again) revealed that it has a small hardwood center to ensure that the screw-eye is going to have a difficult time at best removing itself from the nose cone. Next a short piece of Kevlar is tied into a loop & then attached just inside the BT-50 with both glue & masking tape. A generous 3 foot length of 1/4" elastic is tied onto the nose cone & Kevlar loop.
 Finishing:
The Battle Axe paint scheme is very simple & should be easy to reproduce by almost anyone. The nose cone & BT-50 are black; the fins are silver, lending perfectly to the battle axe imagery. This is also a simple enough 2-color paint scheme to be attempted by a newbie. Prepping the rocket for finishing was a streamlined version of my usual techniques. The plywood has such a tight, dense grain that I didn't bother to fill the grain. The nose cone was covered with diluted Elmer's Fill 'n' Finish then sanded smooth. The entire rocket was primed with Krylon gray primer. A little light sanding to ensure everything was smooth before laying down the Krylon Gloss Black. The main tube was then masked off so the fins could be sprayed with Krylon Metallic Silver.
Finally, came the part I'd been looking forward ever since I got the kit: applying the waterslide decals. I hadn't come across a kit since I returned to the hobby as a BAR a year ago, not to mention the 20 or so years rockets weren't a part of my life!
Construction Rating: 5 out of 5
Flight:
Both of the Battle Axe's first flights were on Estes B4-4s and were identical to the point that it recovered within 10 feet of the same spot. I loved the slower & slightly longer burn of the B4 motors, which appear to be an excellent choice for this rocket. It easily climbed to 500ft and ejected at apogee both times. I wouldn't recommend using a C6-5 unless you've got plenty of room and the Battle Axe is certainly light enough for an A8-3 for extremely small fields.
Recovery:
There is a pre-assembled 12" red Mylar parachute with eight Kevlar shroud lines & swivel included with the Battle Axe. I protected the chute with a few pieces of Estes wadding, and while there is plenty of length to get everything in there, it is a snug fit for the chute. I was initially apprehensive about a safe recovery with the tight fit (which later proved to be unfounded). Ejection was right at apogee & the chute opened quickly once out. Recovery was just the right speed for a LPR. I now understand why some folks swear by Mylar chutes. They hold up well & look great! I did suffer minor damage on both flights, however, I'm going to chalk it up to the windy conditions... First flight came away with an "Estes dent" (dented BT with a nose cone "smiley") and the second flight was the cause of a dent from the nose cone hitting a fin tip (no damage to the rigid ply fin though!) I feel that both were a fluke based on the fantastic recovery system.
Flight Rating: 4 out of 5
Summary:
Rockethead Rockets has really done their homework and put a lot of thought into what should go into an LPR kit, and it shows from the high quality components to the excellent instructions to the unique look. It also generates a lot of interest from kids, who always seem to ask, "Is that an axe?" My response: "Why, yes it is..." The Battle Axe was a dream to build, finish, & fly making it a slam dunk recommendation to be in anyone's fleet.
Overall Rating: 5 out of 5
Other Reviews
- RocketHead Rockets Battle Axe By Bob Cox
OVERVIEW: A single-stage rocket 4FNC rocket with fins shaped like axe blades. Kit Specifications (from the cover art) 18 1/4" Tall 5 3/4" Fin Span 1.8 oz Laser cut 1/16" ply fins Balsa nose cone Kevlar ® shock cord mount 12" Mylar parachute Water slide decals This kit was my prize for placing second in EMRR Virtual Contest #4. ...
- RocketHead Rockets Battle Axe By Chan Stevens
Definitely not your typical 3-fin and nose cone rocket, the Battle Axe is an interesting design that's fun to build and a surprisingly good flyer. Parts arrived in good shape packed in a sealed plastic bag. The list includes: Basswood fins (precut, a huge plus given their curved design) Balsa nose cone BT-50 body tube 18mm motor mount kit Mylar chute (with Kevlar shroud ...
 |
 |
Flights
Sponsored Ads
 |
 |


