| Construction Rating: | starstarstarstarstar |
| Flight Rating: | starstarstarstarstar_border |
| Overall Rating: | starstarstarstarstar_border |
| Manufacturer: | Estes  |
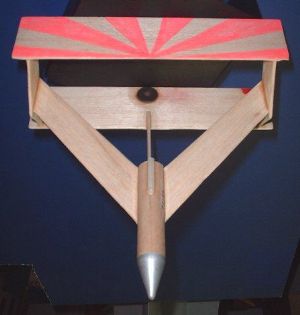
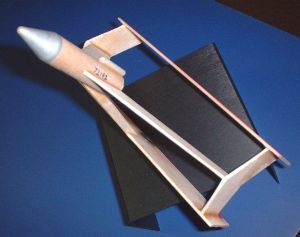
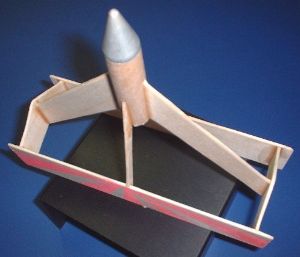
 The Flying Jenny is a bi-wing glider whose plans were published by Estes in their Model Rocket News. Thanks to Jim Z’s archive, you can get them here.
I've built two Jenny's, the first was lost on the roof of a local school, while the second is still going strong after 14 flights.
Construction
Built mostly from balsa sheet, construction is simple and the design has proven to be fairly forgiving. The only non-balsa parts are the launch lug, a short length of BT-20 body tube to hold the motor, and the nose cone which is permanently attached (more on that in the Flight and Recovery section). I've used the short conical nose from Estes (used on the Yankee) with good results.
The plans contain all of the templates for the pieces to be cut out, and you'll spend more time waiting for glue to dry than you do on actual construction. There's also a bit on trimming the Jenny before flight, and some general tips on launching gliders.
Like most gliders, the Jenny has had her share of damage from less-than-perfect landings, and the repair work has had no noticeable effect on the flight profile.
 Finishing
I didn't go to any great trouble to sand and finish either Jenny, beyond rounding the edges of the balsa. The first Jenny was painted with a light coat of white primer, and then I sanded the fuzz off with fine sandpaper. My current Jenny is bare wood, except the wings were given a pattern in neon pink hi-lighter. The hi-lighter helps some with visibility in the air, and reminds me of how crop-dusters are sometimes painted.
Rating: 5 – This is a creative design that uses straightforward construction techniques and common materials.
Flight and Recovery
I've flown my Jenny on A8-3's and B4-2's. Once the glider is trimmed you'll find the boosts are amazingly straight and high. She's definitely a light-to-medium air glider, and doesn't perform well in much more than light breezes. When she's in good air though, it's a sweet thing to watch!
 My second Jenny took three flights to trim properly, and I wound up gluing a heavy washer to the lower wing to add badly needed tail-weight. She's not delicately balanced, you'll need to put significant clay here and there as you trim.
Since the Jenny kicks the motor casing to achieve flight balance, I take a short length of plastic streamer and use masking tape to attach it to the motor. Then I wrap the streamer around the casing and use that to lightly friction fit it into the motor mount. It works well, helps with tracking the ejected motor case as it comes down, and satisfies RSO's who want everything to have some sort of recovery device.
Rating: 4 – Trimming can be a chore, and I've found it easier to do by flights rather than by hand-tossing.
Overall: 4 out of 5 - Everyone seems to like the Flying Jenny, both the way it looks and the way it flies. I will probably always have one in my fleet, because it's fun to fly something a little different sometimes.
Other Reviews
- Estes Flying Jenny By Mike Salter
After seeing the earlier Flying Jenny review I decided I'd build a Flying Jenny. Originally it was just to use up some of the scrap materials I had lying around. Most of the construction is balsa but also is a short length of BT-20, launch lug, and nose cone. I had all of this lying in my scrap box. The plans were much more compact than the instructions we see from Estes now, yet ...
 |
 |
Flights
Sponsored Ads
 |
 |


