Scratch Popsicle Monocopter Original Design / Scratch Built
Scratch - Popsicle Monocopter {Scratch}
Contributed by Art Applewhite
| Manufacturer: | Scratch |
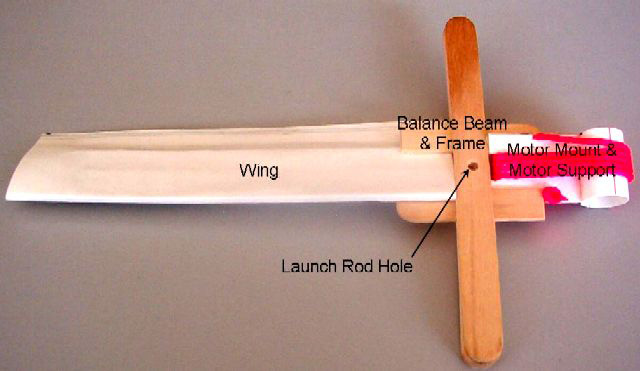 Brief:
This is a 13mm monocopter made from popsicle sticks and index cards.
Construction: Parts consist of:
- 6 popsicle sticks
- (2) 3x5 index cards
- 18" of nylon cord
The wing of the monocopter consists of two popsicle sticks and one 3x5 cards. The 3x5 card is cut down to 2.5" x 5" and folded in the middle lengthwise. Two popsicle sticks are glued to the index card at on edge and along the fold. The index card is folded over the popsicle sticks and glued flat.
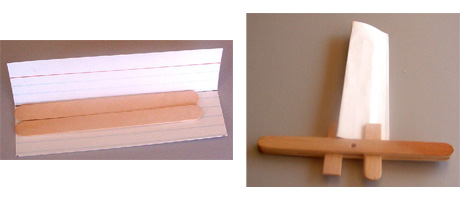
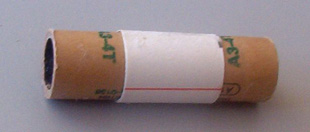 The motor mount is made from the
left over parts of the popsicle stick and some index card. Start by making the motor tube out of a 0.75" x 3"
strip of index card. Wrap the index card around a spent 13mm motor casing and glue it together. Be careful not to wrap
it too tight because some 13mm motor are fatter than others. Also be careful not to glue the motor tube to the casing.
Cut another strip of index card 0.75" x 3". Make two lines across the card one inch apart. Cut off on end on
the line. The result should be 0.75" x 2" piece of index card with a line down the middle shortwise. Glue the
two left over pieces of popsicle stick to the index card with the end against the line. Don't worry that a part of the
sticks will stick out over the end of the index card. Fold the index card over and glue flat to the sticks. Flip the
resulting motor mount over and cut off the extra part of the sticks that stick out past the index card.
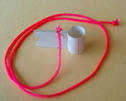 Make a small notch on each side of the motor mount about
0.3 inches from one end. Make a 0.4 inch long, shallow notch at the other end of the motor mount. Glue the motor tube
to the end of the motor mount without the notch. Put a fillet of glue on both side of the joint between the motor tube
and motor mount.
Note: Don't not be tempted to skip the following steps. The forces on the motor are enormous and it will break
loose from the rocket if you don't reinforce
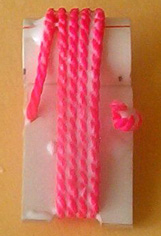 the motor mount with nylon cord. Feel free to substitute
Kevlar®
string if you have it. Tie a knot at each end of the nylon cord to prevent it from unraveling. Put one end of the nylon
cord in one of the side notches on the motor mount and hold it in place with a dab of glue. Wrap the nylon cord 4 times
around the motor tube and motor mount being careful not to distort the shape of the motor tube. Secure the nylon cord
in the other notch on the side of the motor mount and hold it in place with a dab of glue. Coat the nylon cord with
glue and work it into the cord, motor tube and motor mount. Trim off any excess cord once the glue has dried.
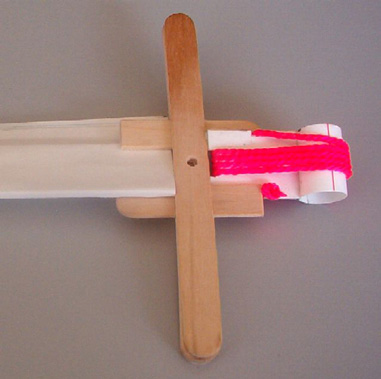
Glue the end of the wing with the popsicle sticks to the center of one side of the balance beam. One edge of the wing should be on top of the popsicle stick and the other edge below the other popsicle stick. This forms the necessary angle of attack for proper flight. Make sure the wing is perpendicular to the balance beam.
Glue the motor mount to the other side of the balance beam with the motor mount tilted in the opposite direction from the wing. Put a heavy fillet of glue alone ALL the joints. Careful drill a 1/8" hole all the way through the balance beam in the exact center.
 Flight:
The best available motor for this rocket is the Estes A3-4T but it will fly nicely on the 1/2A3-2T, A10-0T, A10-3T
and A10-PT. Wrap 3 turns of masking tape 0.25 inches from the nozzle end of the motor to form a thrust ring. Trim off
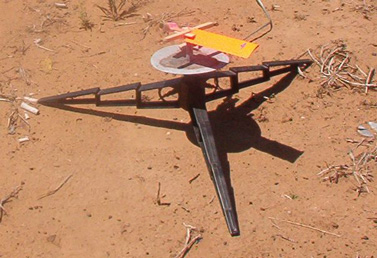
the excess tape. Friction fit the motor into the motor tube. Launch the rocket off a 1/8" launch rod, 1"
long. That's right, ONE INCH LONG, trust me. I made mine launch rod from a 3 inch long piece of thick coat hanger wire
stuck into an Estes Port-a-pad.
 In all the flights I've made so far this
rocket has done very well. Several flights were made in 15 mph winds and it still flew very straight with no weather
cocking and landed close to the pad. Flights with A3-4Ts went about 60 to 75 feet up. Flight with A10-PTs were a little
lower because of the shorter burn time of the A10 motor.
Summary:
This rocket makes a great introduction to the "Mysteries of Monocopters". It flies well in any condition
and is a great backyard and windy-day flier. The smoke and the rapid rotation make a dramatic display with a small
motor. Finally, you can't beat the price. The motors are cheap and most of the parts you'll find in your desk drawer
and refrigerator.
This rocket shows what you can accomplish with almost nothing for parts as long as you are willing to "think outside the box."
Sponsored Ads
 |
 |


