Scratch Mini-Patriot Original Design / Scratch Built
Scratch - Mini-Patriot {Scratch}
Contributed by Steve Carr
| Manufacturer: | Scratch |

Brief:
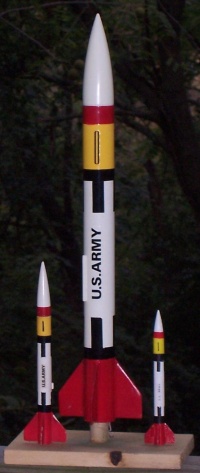
This is a minimum diameter 13mm downscale of the Estes Enduring Freedom Patriot
Missile. It could also be considered a downscale of the Estes OOPs Mini
Patriot. Plus there are a couple of other of versions that I'm aware of. This
is the latest version of this paint job that I have done. I have done the
upscale and downscale of this paint job at least 7 times.
Construction:
Parts list:
- 1 BNC-5W nosecone
- 13mm body tube, 4 3/8" long
- 1 1/8" launch lug, 1/2" long
- 1 13mm engine block
- 4" x 1/2" x 1/16" scrap balsa for fins
- 16" length of small diameter Kevlar®.
- Survey tape for streamer, 12"
- 1 bb for nose weight
Downscaling can be a pain, but when I did the math on this one it came out that the dimensions are 1/3 of the Estes Enduring Freedom Patriot.
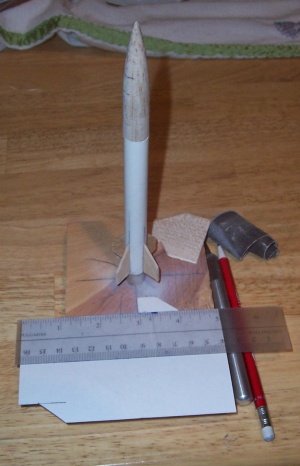
For the fins I used some scrap balsa. They measured 1" for the root edge, 1/2" for the trailing edge, 0.4 inches for the outside edge (I had to use a scale to layout that one), and the leading edge was a matter of drawing a diagonal between the 0.4" and 1" mark. The fins were drawn on an index card that I used as a template. When traced on the balsa, I kept grain direction in mind. The body tube was marked with a marking guide left over from some past kit. Never throw those things away--you may need them. The engine block was glued in using white glue and a spent engine to set the depth, leaving 1/4" of the motor hanging out the back. The fins were glued on using thin CA. I also coated the fins with thin CA for strength. The fins were held 1/16" from the bottom of the rocket. The launch lug is glued next to one of the fins making sure it does not go past the leading edge of the fin.

Finishing:
There are a couple of steps to get the paint right. I think the paint is
important to this downscale because it identifies the rocket as a Patriot. The
entire rocket was first primed and then painted gloss white. Starting from the
top, the paint layout I used is as follows:
- 1 inch white
- 3/8 inch red
- 3/4 inch yellow
- The rest of the nose cone back
I started on the body tube by taking a black marker and going around the rim to finish the black. The black stripes are 3/16" by 1/2" long. I used the fin marking guide to center them and layout for the bottom stripes also.
I painted to the top of the fins red and a 3/8" band of black on top of that.
I used rub on letters from Radio Shack, but I am not happy with the look so I think I may cover them up with a lay over printed on the computer.
The black stripes on the yellow were just drawn in with a roller ball pen.
Flight:
I didn't simulate this rocket but I did swing test it. It was a little light in
the nose so I added a bb to the inside for weight. I simply drilled an
1/8" hole into the cone and pushed it about an inch into the cone. This
got it swinging level. I also used the hole to attach the shock cord. I
inserted the Kevlar®
into the hole and used a small amount of epoxy to glue it in. The other end was
attached via an Estes style paper folded shock cord mount deep inside the body
tube. The streamer is a foot long piece of survey tape in the middle of the
Kevlar®.
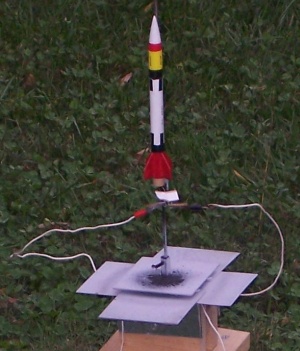
I took my newest Patriot to the local ball fields for these flights. I went right after work so as to get done before football practice, but I still drew a bit of a crowd of little football players who arrived early.
 Flight 1:
1/2A3-4T and some dog barf. This is the motor for this rocket. It was overcast
but it was easy to spot and the delay was right on.
Flight 2: Another 1/2A3-4T. Maybe was a 1 on the delay. I lost half of the streamer.
Flight 3: I got aggressive and went with an A3-4T. Whiplash city. The delay was on time but they don't make a 6 second delay. It held together though. I didn't see the ejection but I caught it way up there cartwheeling in the sky.
Summary:
This probably would be better suited as a Micro Maxx rocket. At least you could
see it. I like the performance of minimum diameter 13mm rockets and this is the
smallest version of the Patriot to date. They are very high performance but if
you want a paint job to match they can be a pain.
Sponsored Ads
 |
 |


