(Contributed- by Dick Stafford - 06/15/03)
 Brief:
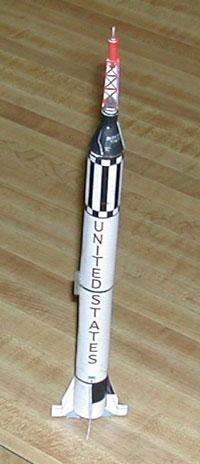
This rocket was based on a free paper model kit from Delta 7 Studios. I converted it to fly on MMX motors, although the model is large enough for up to 18mm motors. Of course, the larger motors may require additional reinforcement that wasn't required in my MMX version.
Modifications:
Once the paper model was complete, I proceeded with its conversion to a flying model. Since I wanted to use it for MicroMaxx, I wanted to keep the added components to a minimum. If you wanted to use larger motors, more effort would be in order.
The motor mount is a piece of 7mm (T-2+) tubing from Totally Tubular, and two hand-cut card stock rings. Scrap card stock was rolled and used as a motor block. I used a piece of a BiC pen's ink tube for the launch lugs. One is near the center of the model and the other is on the side of a fin. I attached these with Liquid Nails. I had wanted a piece of clear tubing for the nose cone shoulder to keep the base of the capsule visible but I didn't find any, so I used a piece of an Estes 18mm motor spacer tube instead. I elected to glue the tower on, and added a small dowel to stiffen it.
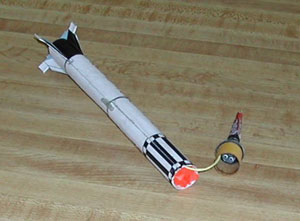
I pondered a full recovery system - shock cord connecting the cone to the body, streamer, etc. However, I decided that this wasn't necessary for low flights on soft-grass. To save my Kevlar, I decided to let the body tumble and to add a small streamer to the cone so I wouldn't lose it in the grass. The streamer is tied to a short leader of Kevlarthat is epoxied to the inside of the shoulder.
The CG of the model with a MMX-II installed is 6.75" from the top of the escape tower (ignoring the tiny tip).
 Construction:
The kit includes:
- One sheet of white cardstock
- 7mm tubing ~ 1.5" long
- Hand-cut cardboard centering rings
- 1" piece of an Estes engine spacer tube
- 1" of 1/16" dowel
- Piece of a BiC pen's ink tube
- 4" of Kevlar twine
- 12" section of plastic marking tape
The parts and instructions each come in a .pdf file. The model includes 19 parts, which you print on a single 8"x 11" sheet of cardstock. The photo-illustrated instructions are three pages long. These are well detailed and are more than adequate for this relatively simple model.
Construction of the booster is straightforward. The body consists of two wraps that are formed into cylinders and connected together with a coupler. The body is almost exactly BT-20 sized. The fins are each cutout and folded over onto itself so both sides have a printed surfaces. The Mercury capsule, with eight parts, is a little more challenging, but is also easy to construct. The final component is the tower, which has four parts. I built the base paper model entirely with white glue.
I printed the model on cardstock on my OfficeJet and gave it a clear coat for protection.
Flight:
I added small piece of tape to the motor to keep it in at ejection. You may notice that I didn't add an inside tube or protect the cardstock from the motor ejection. I packed some cellulose wadding into the tube, rolled the streamer and gave it a try. Evidently, this wadding and the spacing between the motor and the body was enough to protect the card stock body.
I flew this three times so far. On the first flight, I found that I needed the lower lug. The rocket arced over and ejected down range. I added the lug and the next two flights were picture perfect. For such a large model, I was surprised how high it went. The capsule was easy to find and the body tumbled without going 'ballistic'. My cheap recovery method was OK after all.
Summary:
This is a great looking, simple scale model that would be an excellent introduction to paper model conversion. It flew great on MMX-II motors and should adaptable to 13mm or even 18mm motors. If you look around the Delta 7 Studios' site, you will find someone has in fact done so.
Sponsored Ads
 |
 |


